
Tutorial: Fastest ever Jekyll deployments via GitHub
Jekyll transforms plain text into static websites and blogs. Written in Ruby, Jekyll is a pioneer among static site generators. And a terrific one, too. For starters, you get to focus on your content and your content alone. No need to bother with databases, comment moderation and updates. What you put in – whether it’s CSS, HTML or Markdown – comes out as a ready-to-deploy static site in no time. And being fully-blog aware, Jekyll is the perfect companion to quickly launch or import blogs without programming knowledge.
What’s not so great about deploying your content is having to worry about hosting. Oh, and having to repeat the same mundane deployment steps over and over again with every merge and change. The good news is that Deploy Now does all that for you and more. Deploy Now is a build tool created by developers for developers, bringing together modern Git workflows and IONOS infrastructure. It’s simple enough for pure content writers but also suitable for professional web app development.
Ready for your fastest Jekyll deployment ever? Let’s go.
What you need to get started
- A static Jekyll site in a GitHub repository. If you just want to see how everything works first, you can simply clone our starter.
- A Deploy Now account
Deploy Now and GitHub Actions – a match made in heaven
GitHub Actions automates, customises, and executes software development workflows right in the repository, making it the perfect link between the worlds of hosting and web development.
GitHub Actions automatically perform tasks based on various triggers, like you making changes to the actual content in whatever form it’s in. These Actions exist as editable yaml files that can be customised to your heart's content with the help of thousands of Actions available on the GitHub Actions marketplace.
Deploy Now can launch projects in seconds because the setup assistant automatically scans the selected repository and produces out-of-the box Actions for your project.
To be specific, Deploy Now scans your repo and presents you with a prefilled workflow – a file placed directly in the repository. With a final push of a button, Deploy Now publishes your site on IONOS infrastructure. You’ill receive a preview URL which you can replace with a custom domain.
The 4 steps to a next-level publishing experience
- Sign up for Deploy Now and link it with your GitHub account. Deploy Now will need access to the GitHub repository that you want to deploy from.
- Select the repository with that Jekyll site you want to publish.
-
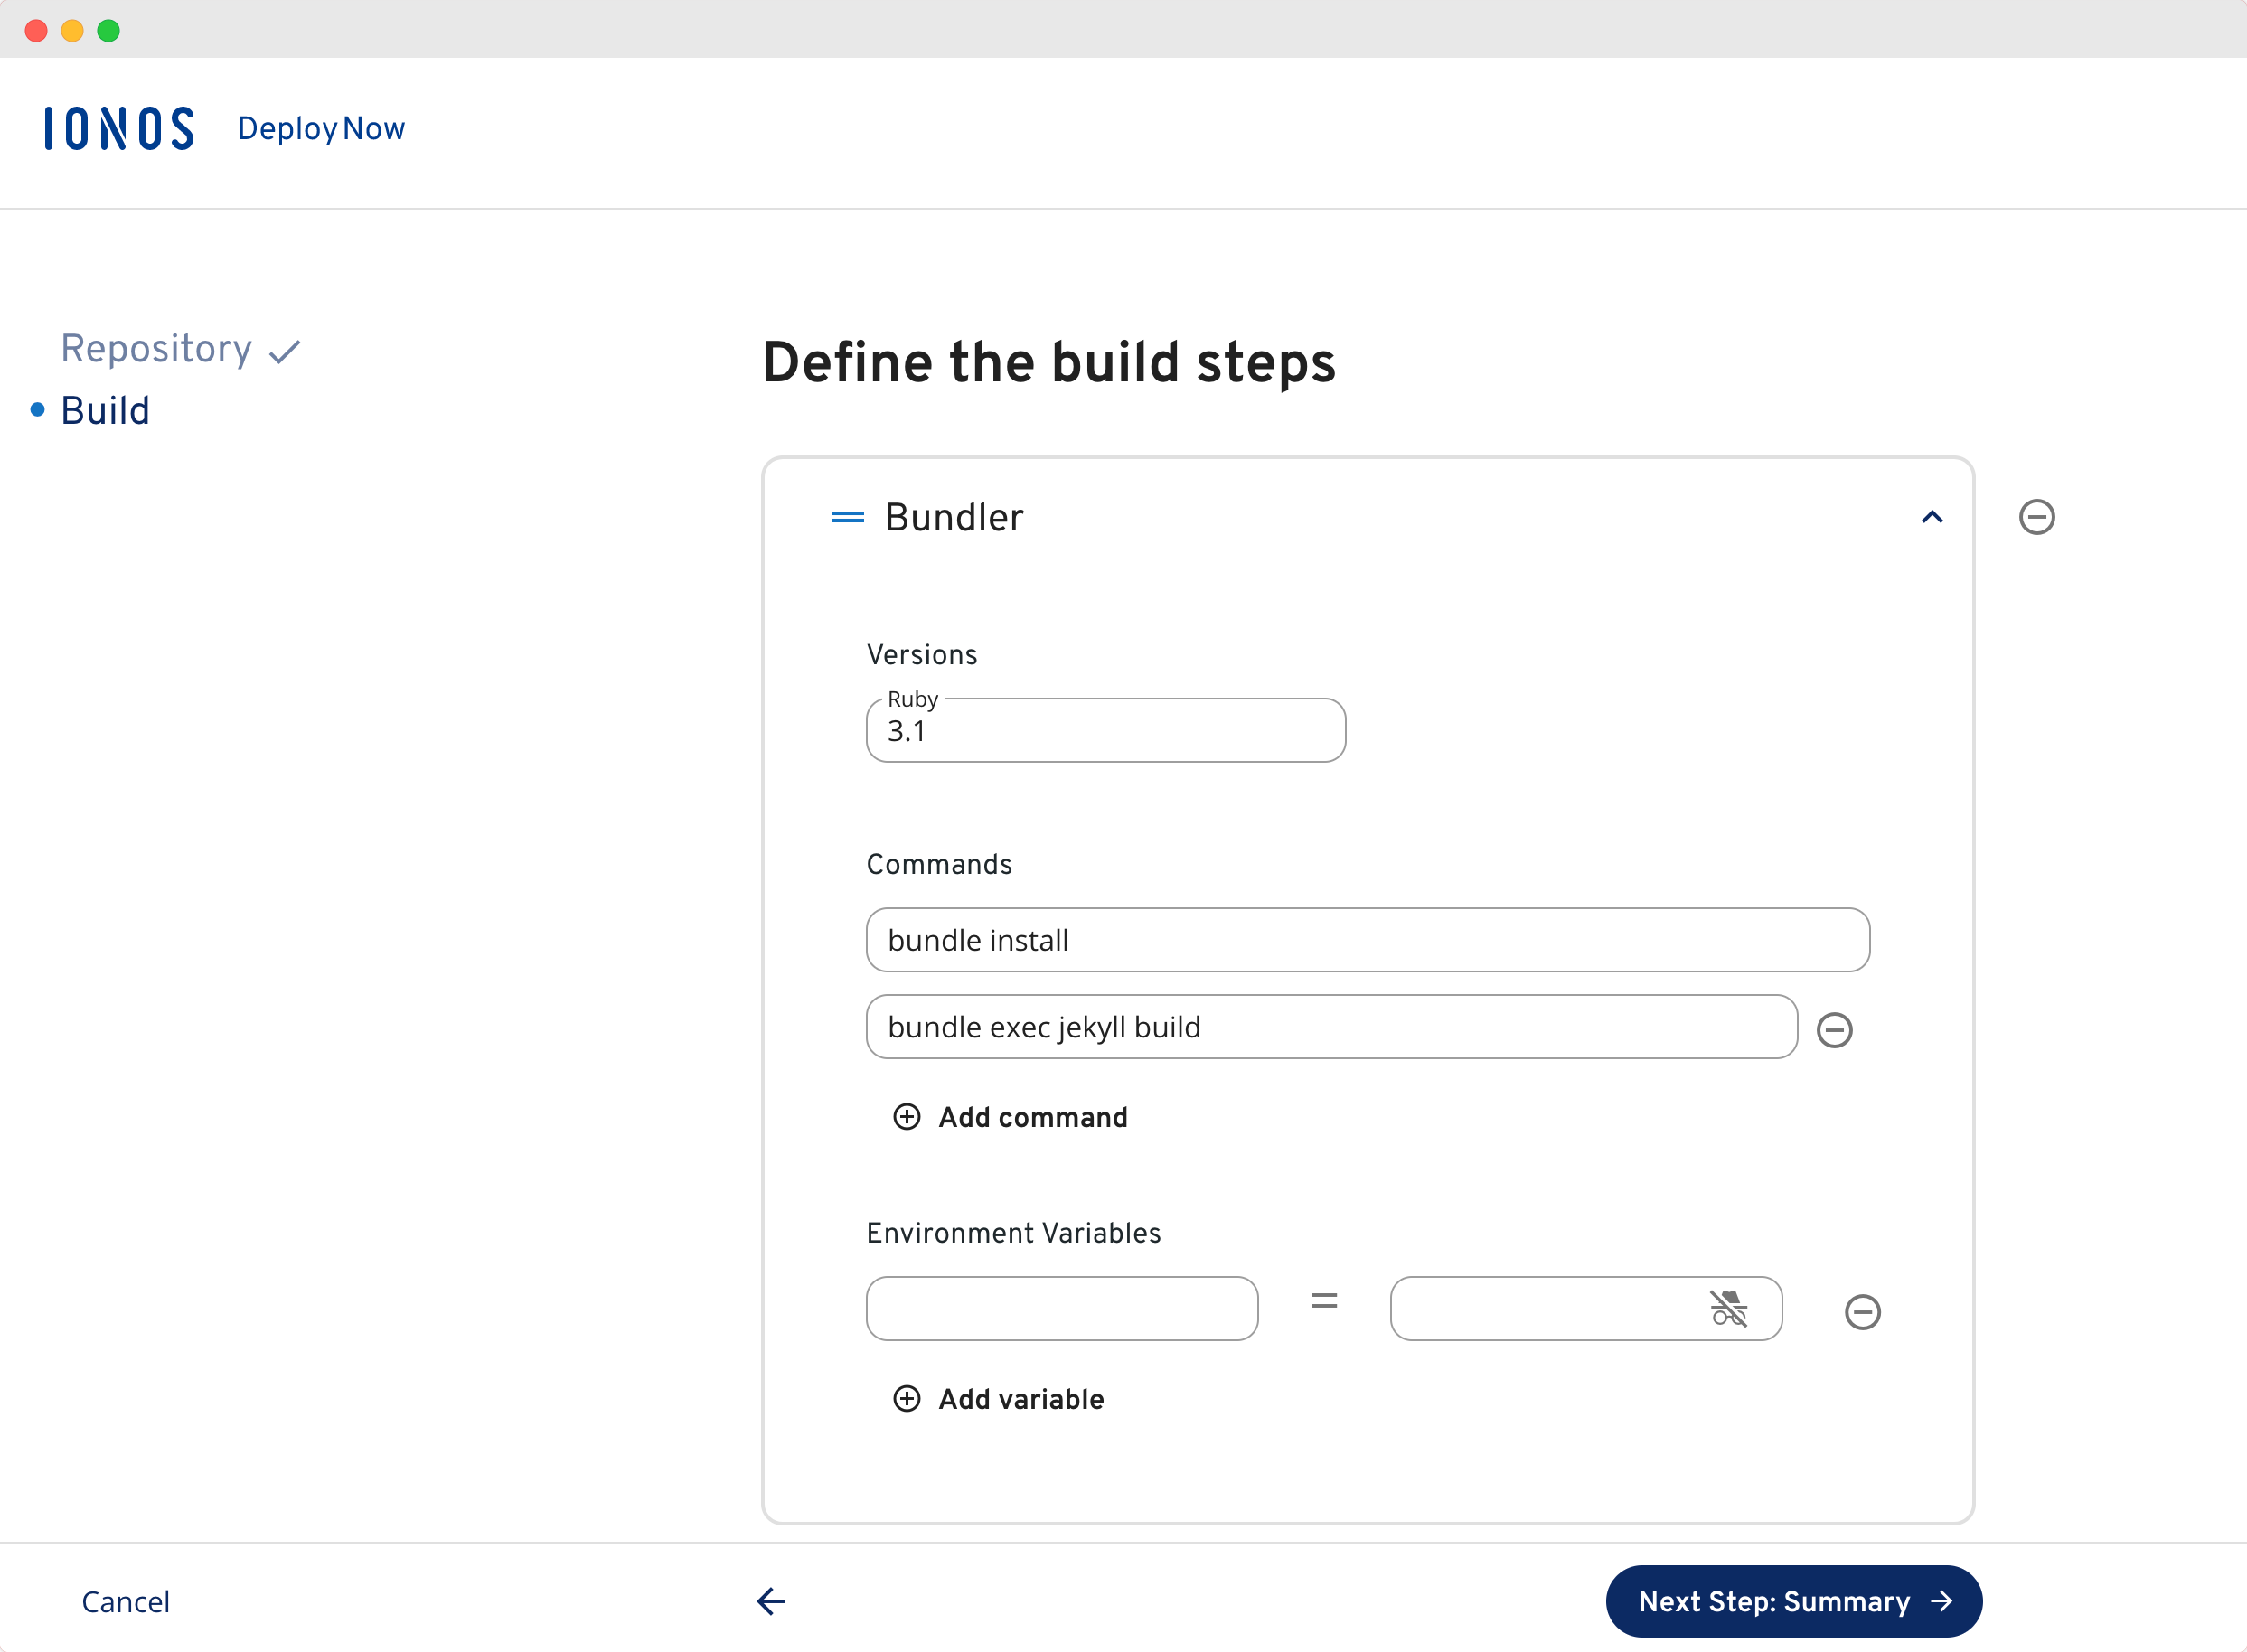
Review the suggested build steps. For Jekyll, Deploy Now will preselect the Ruby programming language alongside build commands and a publishing directory.
Tip
Jekyll projects require a bundler build step. Bundler manages packages (gems) in Ruby – the programming language of Jekyll - and ensures they are available in the correct version for your project. These dependencies are defined in a gemfile containing all the gems required for a website or application. Bundler then takes this list, installs the respective packages, and makes them available to your project.
If Deploy Now has successfully detected Jekyll, it will add the two commands shown in the screenshot to your build workflow.
bundle installinstalls the defined dependencies from the Gemfile whereasbundle exec jekyll buildgenerates the HTML and CSS files of your website and copies the result to the _site folder. - Finally, check any settings you have made and click on create project. You’ll be redirected to the project detail page while your site is being built and deployed in the background.
There you have it! Your site is now live on green, DDoS-protected web servers, located in IONOS data centres in Europe and North America. Enjoy adding your own custom domain, monitoring the page traffic or creating additional staging environments.
