From Command Line
You don't have a specific project at hand and you want to start from scratch? Below you can find instruction how to set up projects with popular web technologies and frameworks starting just from the command line.
Not what you are looking for? Start from a sample or deploy an existing repository.
Static Websites
A static website is delivered to the user's web browser exactly as stored on the web server. Static websites often consist out of HTML, CSS, JS and media files. Maintaining large numbers of files can be impractical without automated tools. Over the last years Static Site Generators evolved to face this problem. Below some classic representatives of this craft.
Html Site
The HyperText Markup Language, or HTML is the standard markup language for documents designed to be displayed in a web browser.
- Create a simple plain html site
mkdir html-site
cd html-site
echo '<!DOCTYPE html>\n<html>\n\t<body>\n\t\t<h1>Hello World!</h1>\n\t</body>\n</html>' > index.html
echo "file://`pwd`/index.html"- Visit your site locally by copying stdout to your favorite browser bar.
- Now, create a new Git repository on GitHub and copy the URI of the repo to your clipboard.
Afterwards initialize git and push your project to the created GitHub repository by the following commands.
git init -b main
git add .
git commit -m "initial commit"
git remote add origin git@github.com:username/reponame.git # replace by URI of your repo
git push -u origin main- Setup deployment
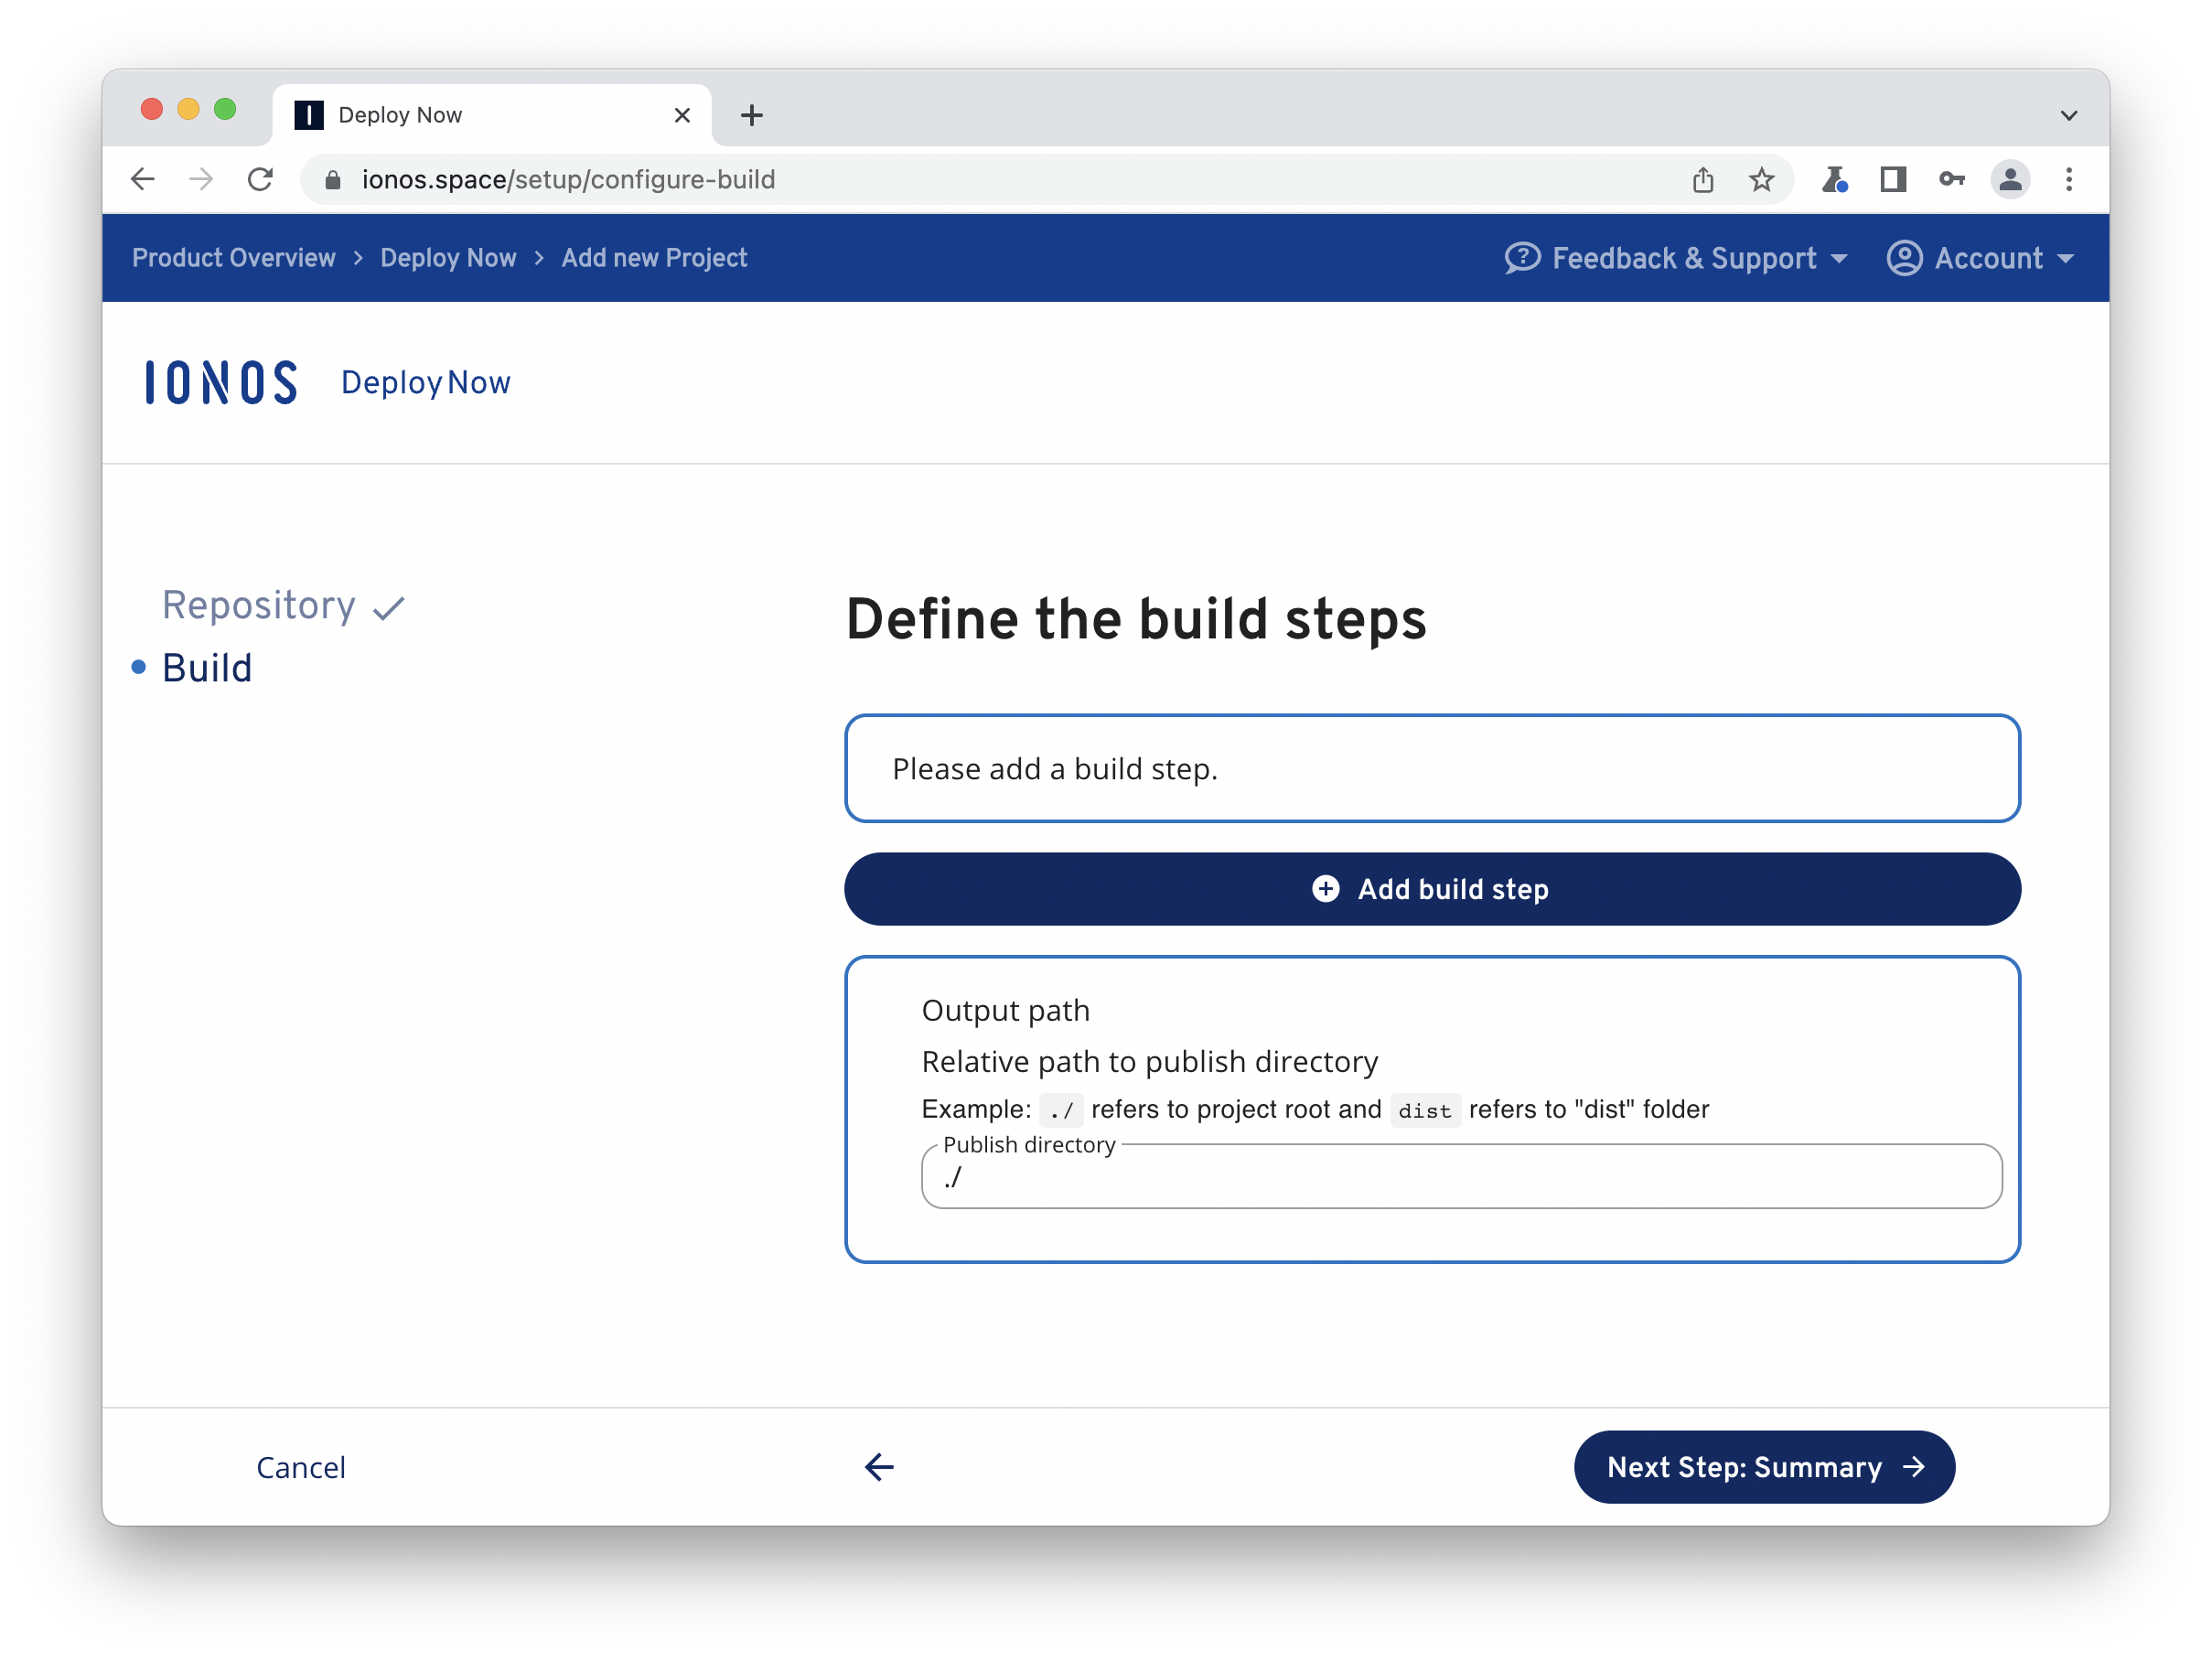
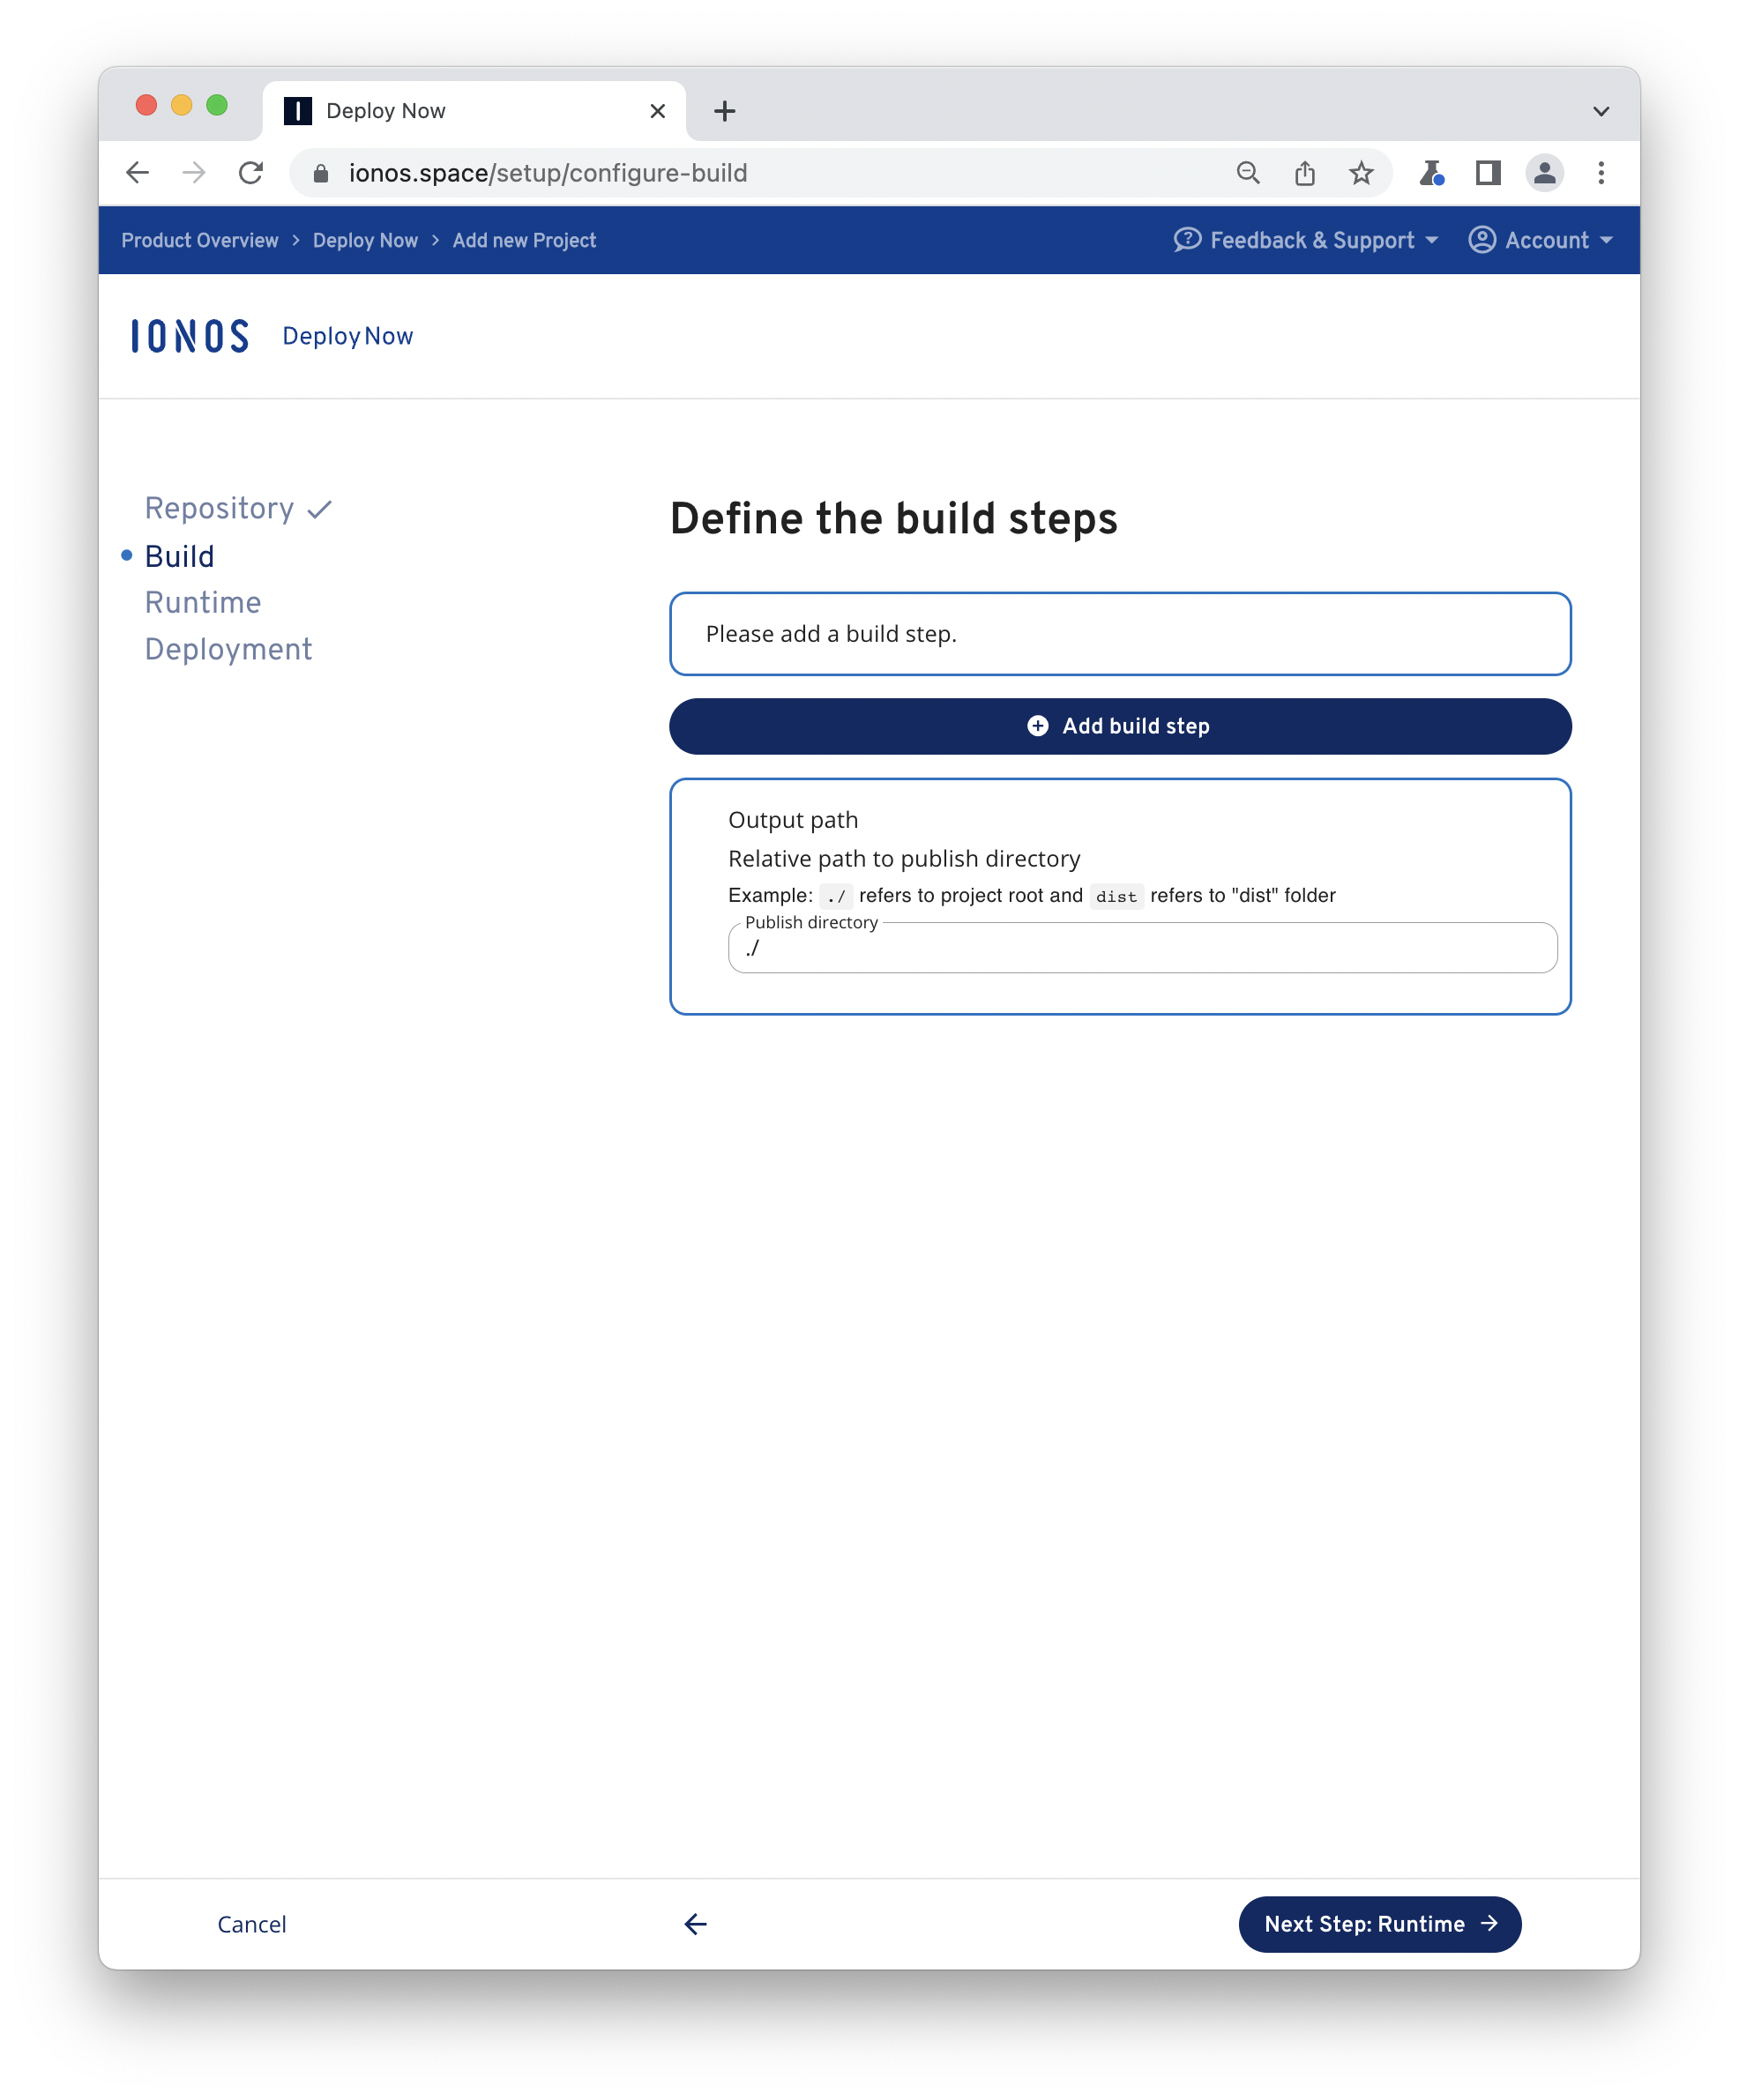
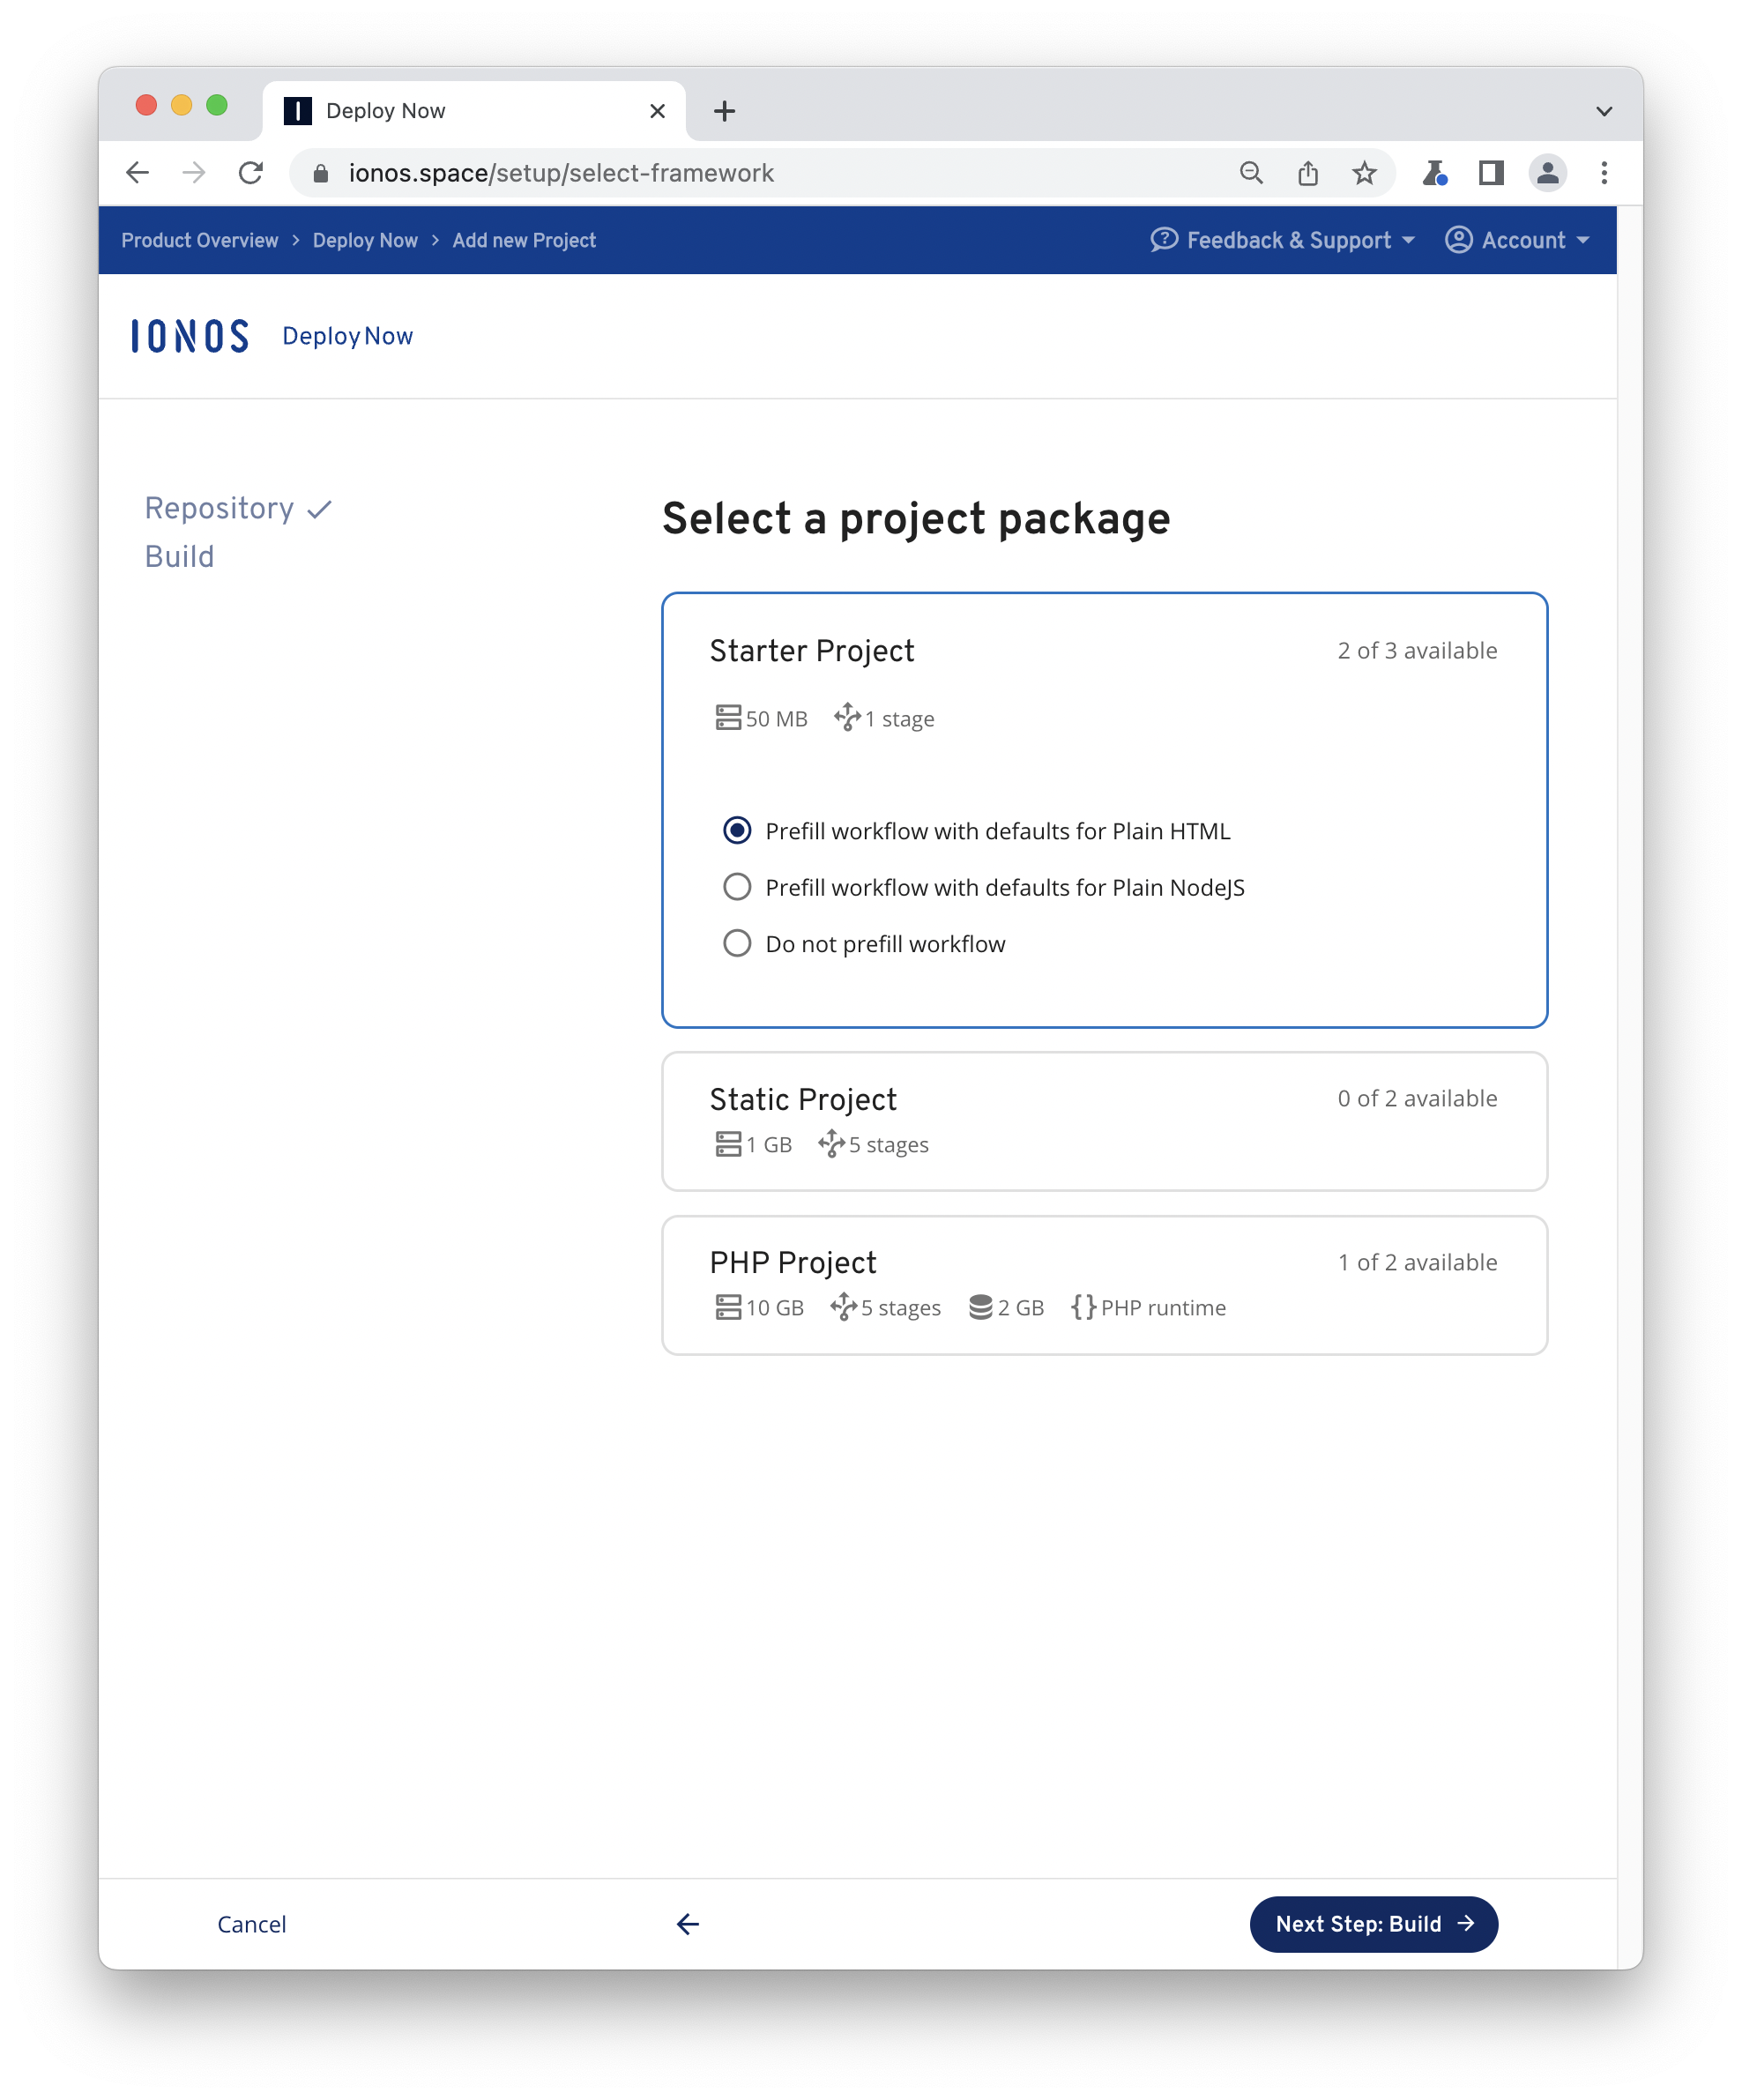
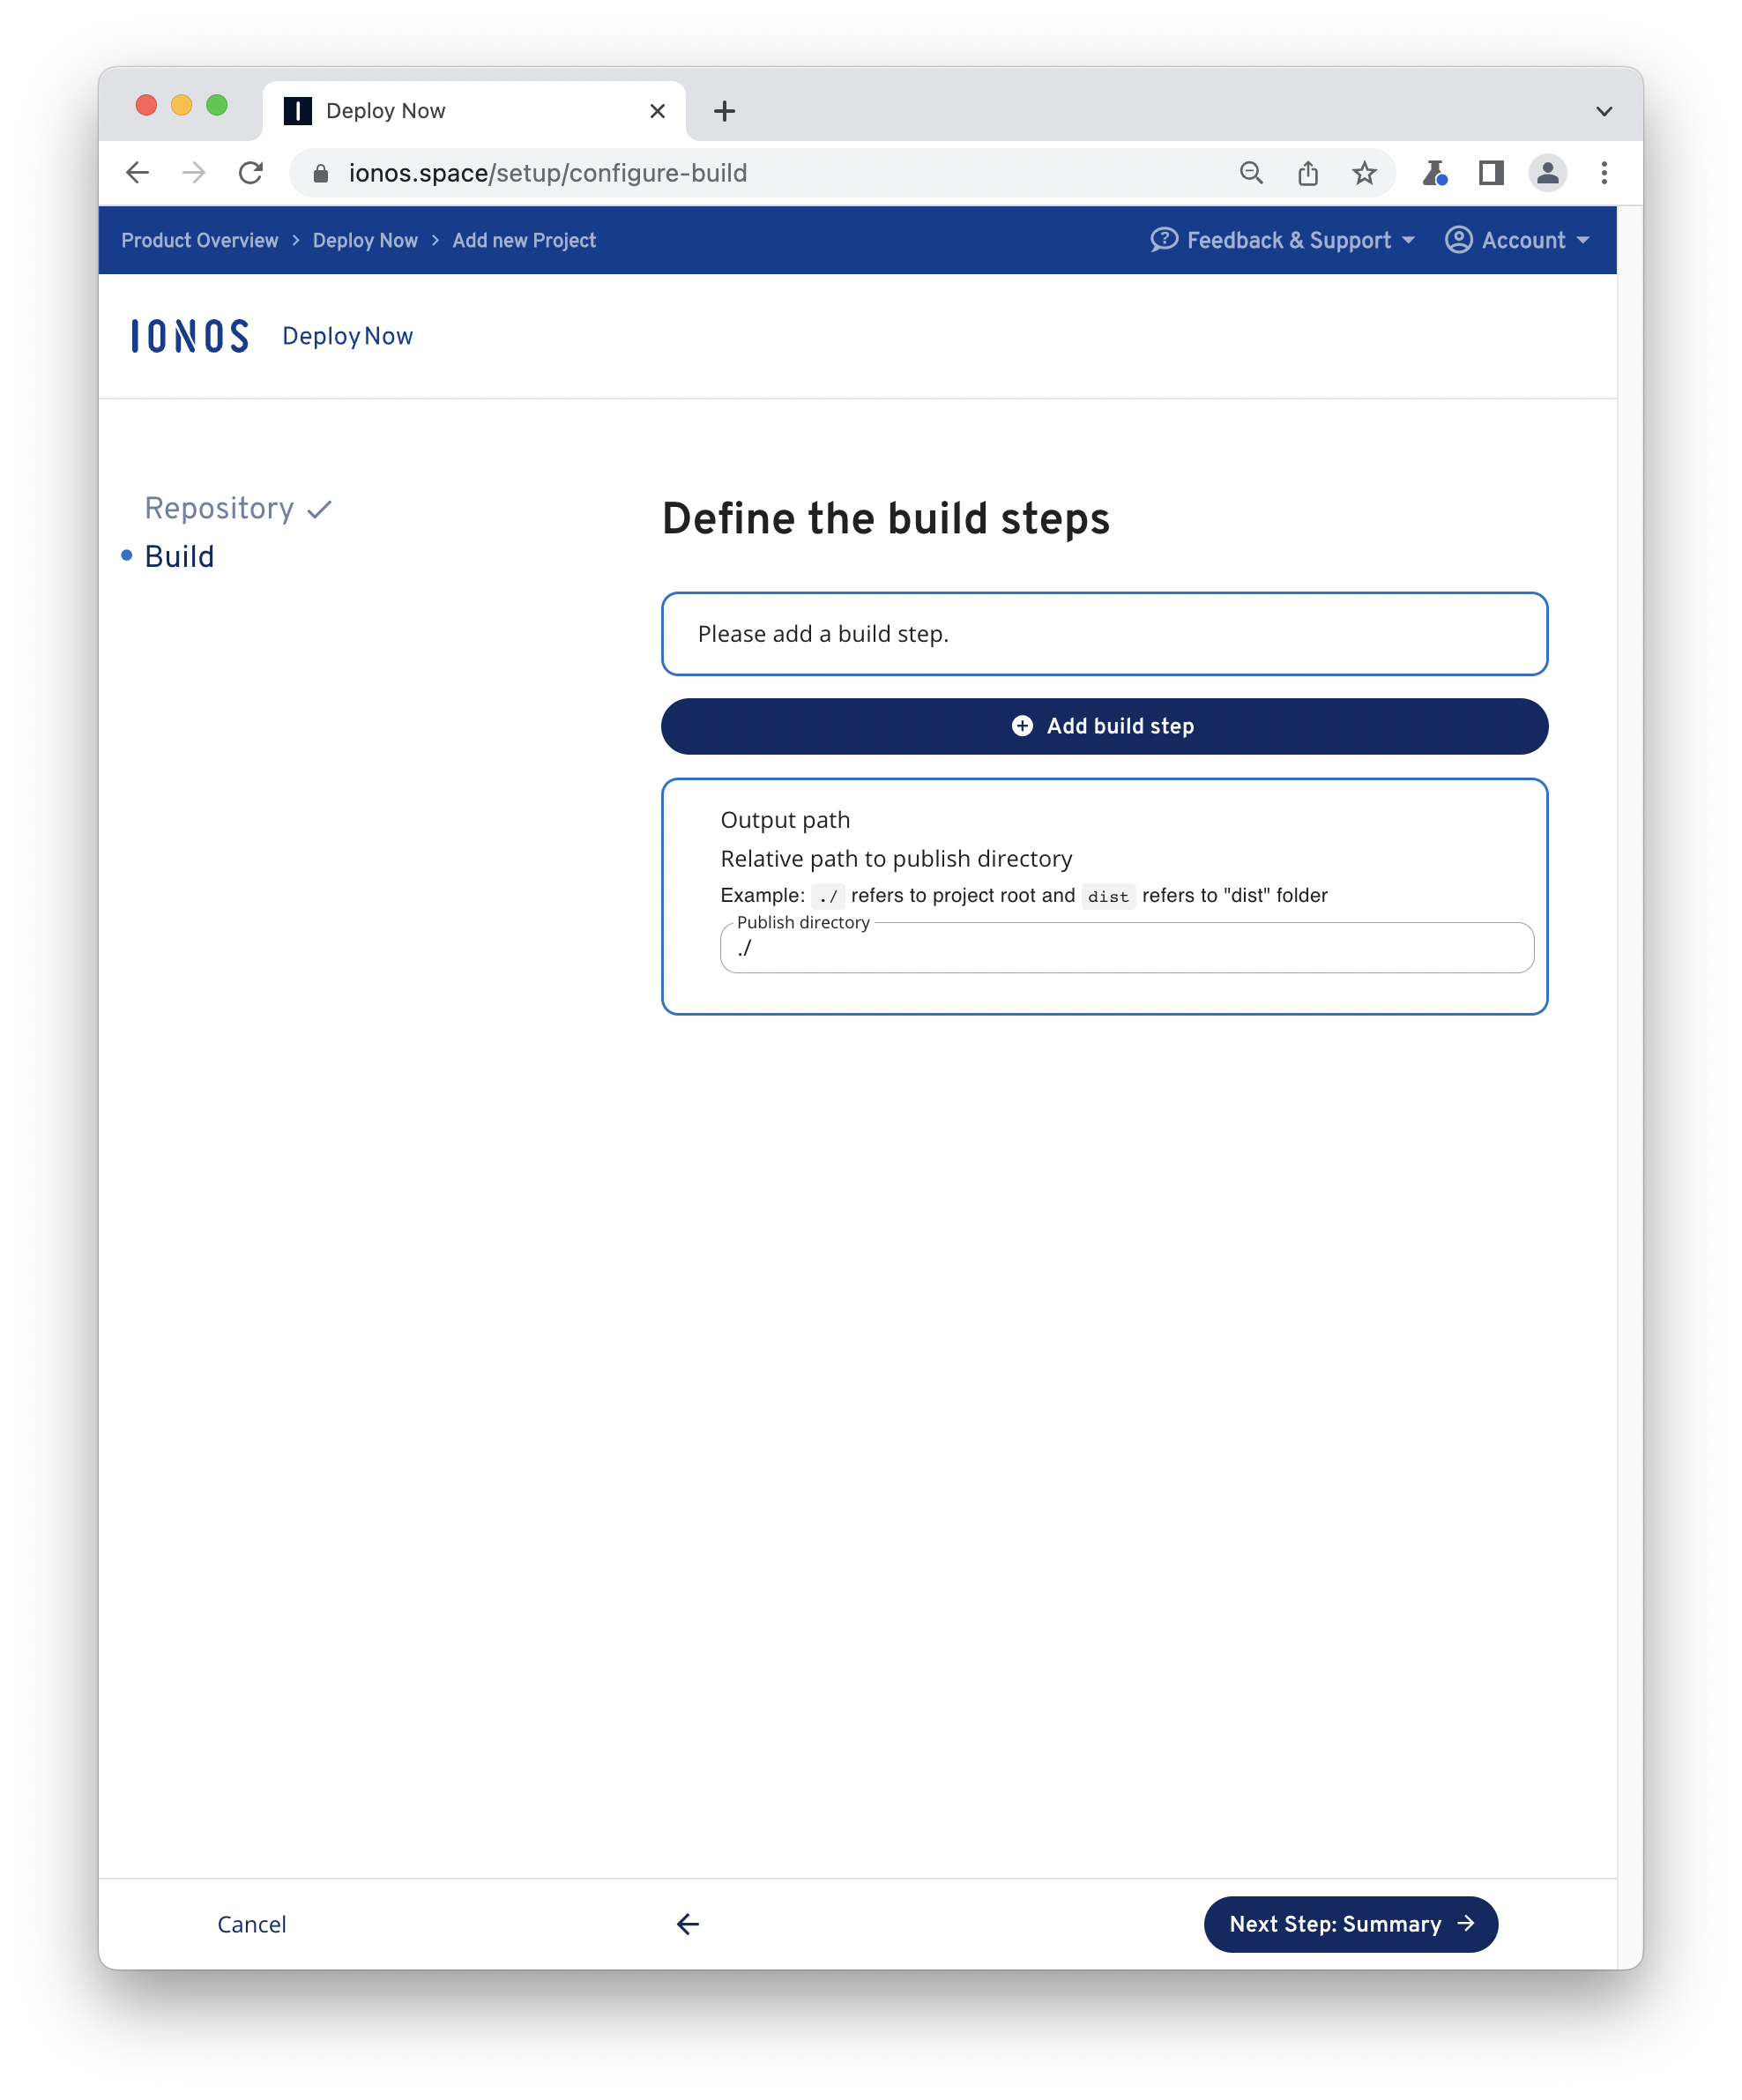
Sign in to your Deploy Now account and click Add new project. Next, choose your newly created project. With your selection Deploy Now will try to detect your framework specific on the fly and suggest an appropriate project package. In this case this should result in HTML without any further build steps. This is fine in this case. Just proceed and finalize the setup.
Now, take a short break until your project is deployed. Deploy Now will always show you the current build and deploy status of your project. If it's done Deploy Now provides a direct URL to your project.
Now, if you look at your repository you will find workflow files for build and deployment in .github/workflows. Feel free to customize your workflow from here.
PHP Site
PHP (recursive acronym for PHP: Hypertext Preprocessor) is a widely-used open source general-purpose scripting language that is especially suited for web development and can be embedded into HTML.
- Create a simple PHP site
mkdir php-site
cd php-site
echo '<?php phpinfo(); ?>' > index.php
php -S localhost:8000- Visit your site locally by copying localhost:8000 to your favorite browser bar.
- Now, create a new Git repository on GitHub and copy the URI of the repo to your clipboard.
Afterwards initialize git and push your project to the created GitHub repository by the following commands.
git init -b main
git add .
git commit -m "initial commit"
git remote add origin git@github.com:username/reponame.git # replace by URI of your repo
git push -u origin main- Setup deployment
Sign in to your Deploy Now account and click Add new project. Next, choose your newly created project. With your selection Deploy Now will try to detect your framework specific settings on the fly and suggest an appropriate project package. In this case this should result in PHP without any further build steps. This is fine in this case. Just proceed and finalize the setup.
Now, take a short break until your project is deployed. Deploy Now will always show you the current build and deploy status of your project. If it's done Deploy Now provides a direct URL to your project.
Now, if you look at your repository you will find workflow files for build and deployment in .github/workflows. Feel free to customize your workflow from here.
CSS Frameworks
CSS Frameworks stand for easier, more standards-compliant web design using the Cascading Style Sheets language. Most frameworks contain at least a grid. More functional frameworks come with more features and additional JavaScript based functions. The focus is always around interactive UI patterns. A notable and widely used CSS framework is Bootstrap. You find a listing of other CSS Frameworks alternatives here.
Free bootstrap templates can easily be consumed with Deploy Now as 3rd party repositories.
- Setup deployment
Sign in to your Deploy Now account and click Add new project. Next, choose Third party repositories and enter your favorite bootstrap template. With your selection Deploy Now will try to detect your framework specific settings on the fly and suggest an appropriate project package. In this case this should result in HTML without any further build steps. This is fine in this case. Just proceed and finalize the setup.
Now, take a short break until your project is deployed. Deploy Now will always show you the current build and deploy status of your project. If it's done Deploy Now provides a direct URL to your project.
Now, if you look at your repository you will find workflow files for build and deployment in .github/workflows. Feel free to customize your workflow from here.
Single Page Applications (SPA)
A single-page application (SPA) interacts with the user by dynamically rewriting the current web page with new data from the web server, instead of reloading the entire page for every request.
React App
A JavaScript library for building user interfaces
- Create a new React app
npx create-react-app@latest react-app
cd react-app
npm i- Visit your site locally by copying localhost address from CLI stdout to your favorite browser bar.
npm run start- Now, create a new Git repository on GitHub and copy the URI of the repo to your clipboard.
Afterwards initialize git and push your project to the created GitHub repository by the following commands.
git init -b main
git add .
git commit -m "initial commit"
git remote add origin git@github.com:username/reponame.git # replace by URI of your repo
git push -u origin main- Setup deployment
Sign in to your Deploy Now account and click Add new project. Next, choose your newly created project. With your selection Deploy Now will try to detect your framework specific on the fly and suggest an appropriate project package. With React Deploy Now will propose a NodeJS build step with prefilled inputs from the package.json of the repository. All defaults in this case should be fine. Just proceed and finalize the setup.
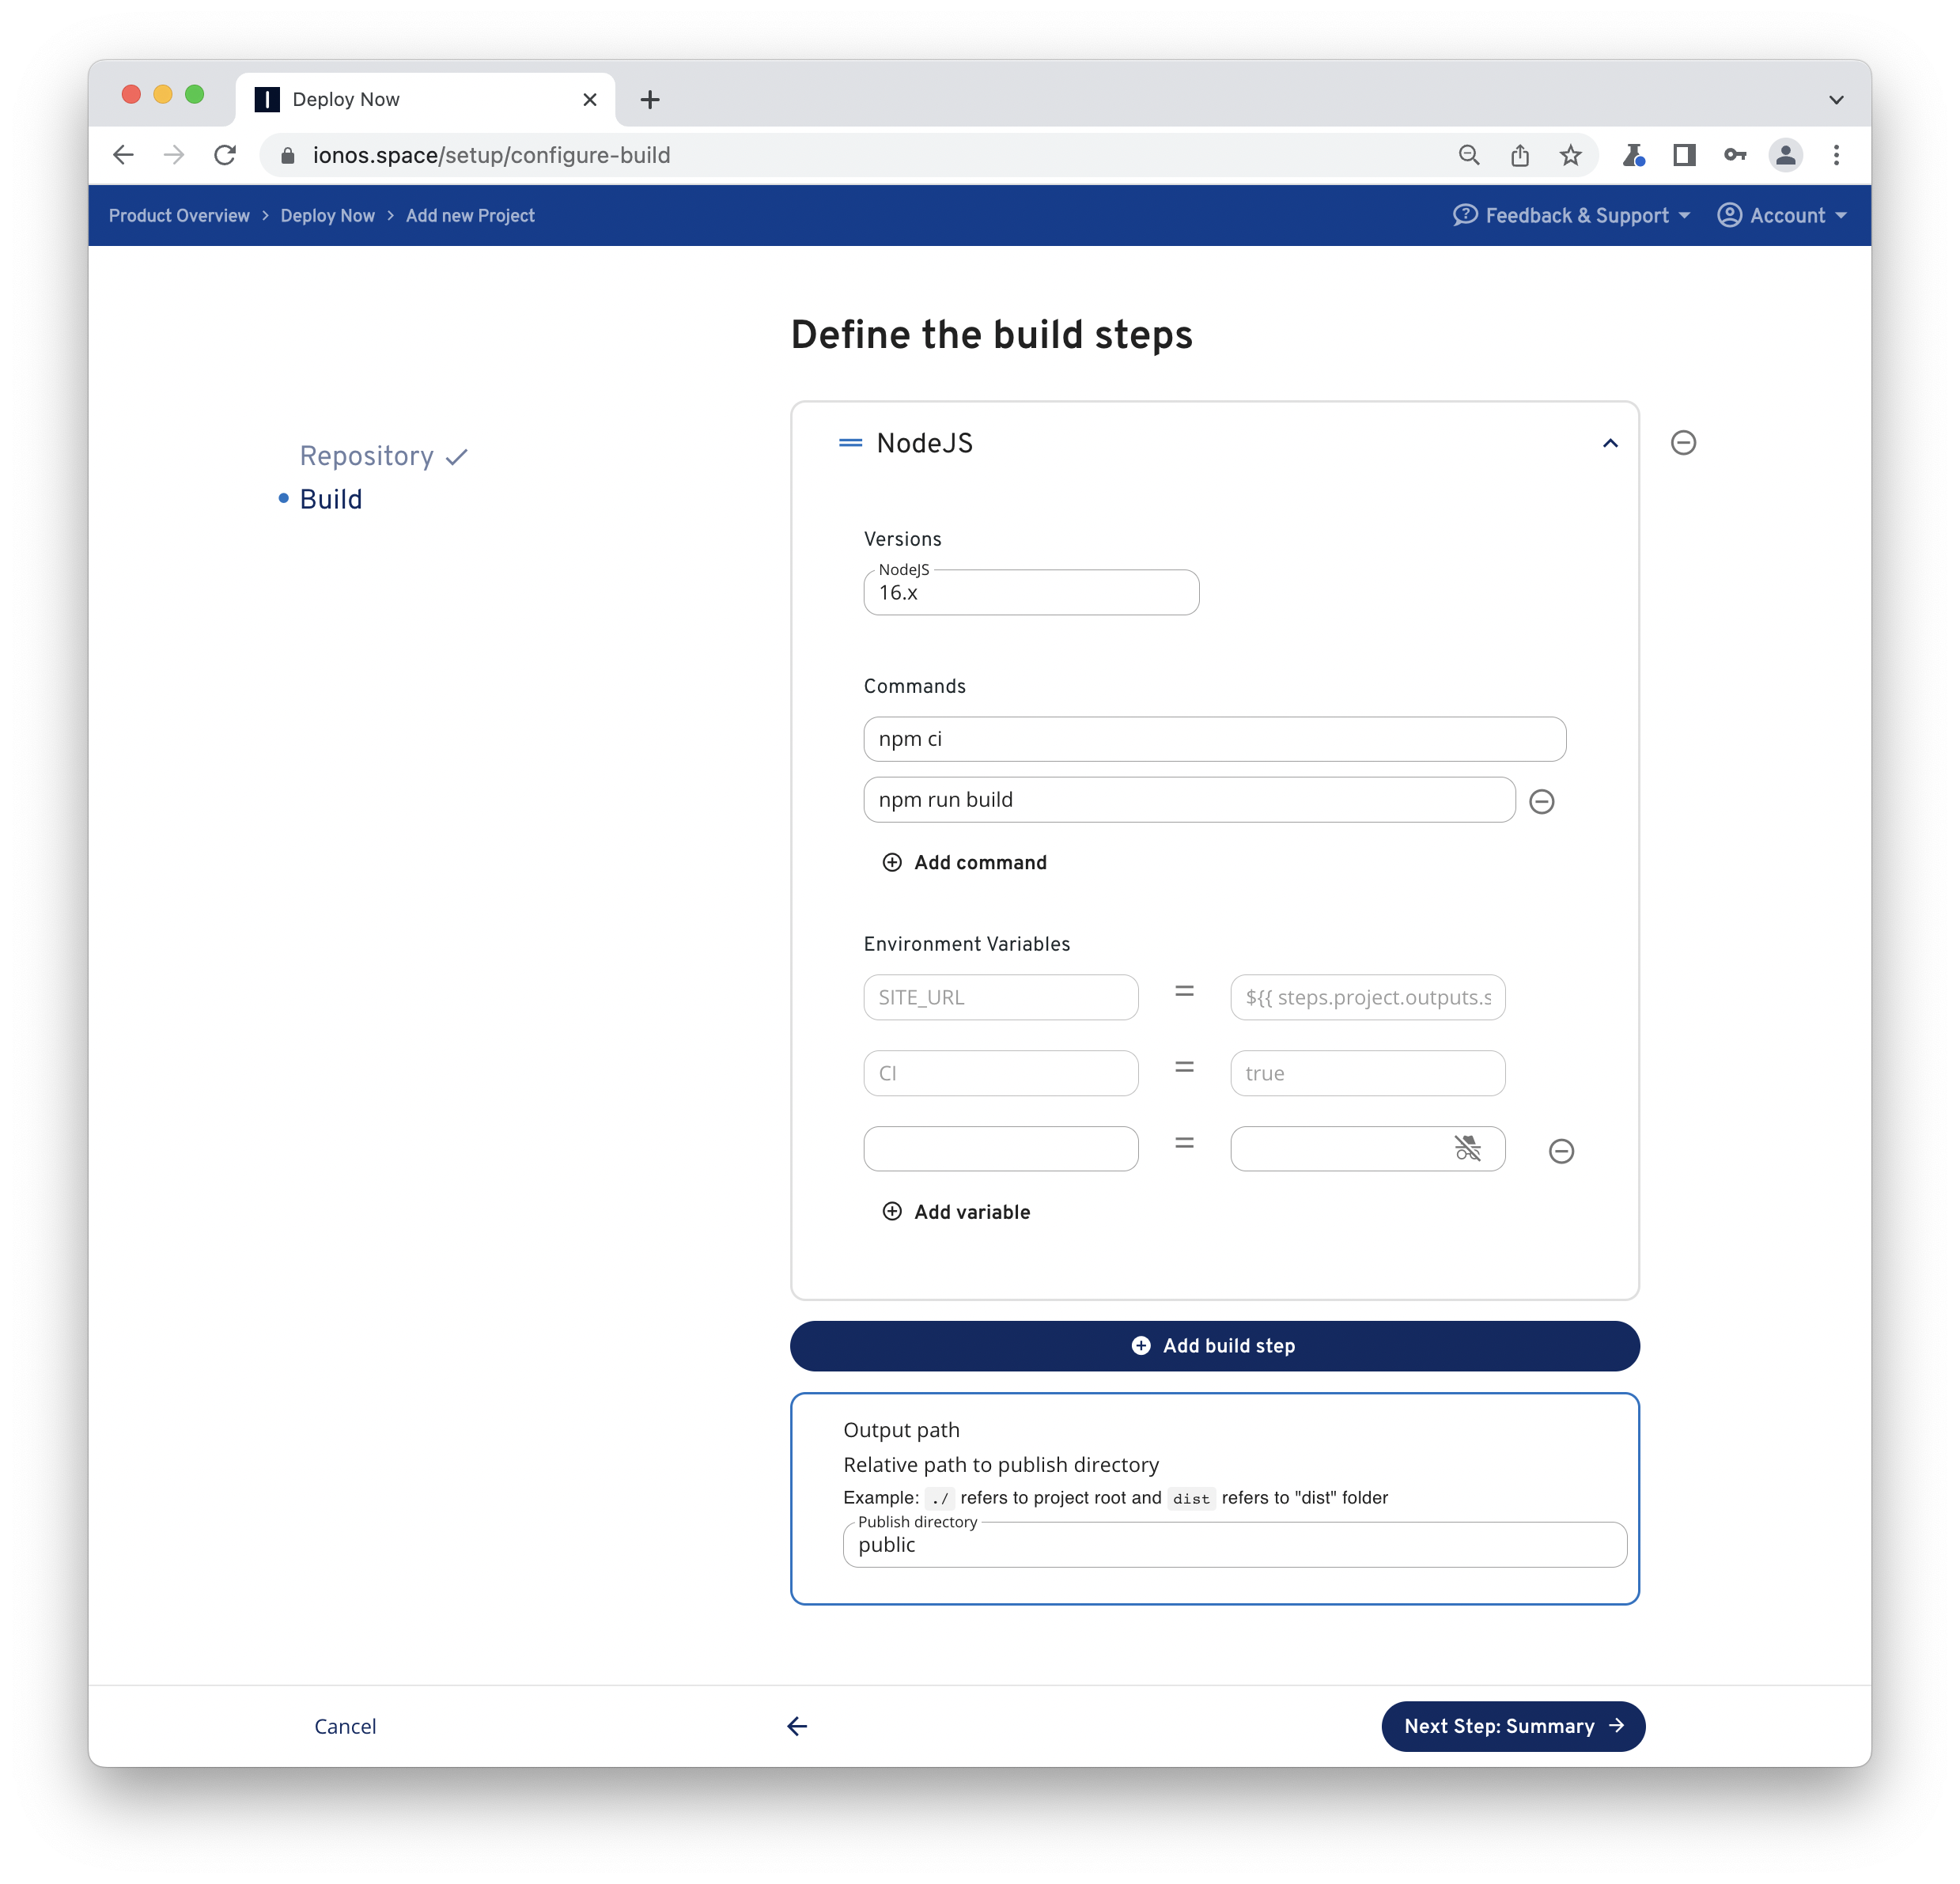
Now, take a short break until your project is deployed. Deploy Now will always show you the current build and deploy status of your project. If it's done Deploy Now provides a direct URL to your project.
Now, if you look at your repository you will find workflow files for build and deployment in .github/workflows. Feel free to customize your workflow from here.
Vue App
The Progressive JavaScript Framework
- Create a new Vue app.
npx @vue/cli@latest create --default vue-app- Visit your site locally by copying localhost address from CLI stdout to your favorite browser bar.
cd vue-app
npm run serve- Now, create a new Git repository on GitHub and copy the URI of the repo to your clipboard.
Afterwards initialize git and push your project to the created GitHub repository by the following commands.
git init -b main
git add .
git commit -m "initial commit"
git remote add origin git@github.com:username/reponame.git # replace by URI of your repo
git push -u origin main- Setup deployment
Sign in to your Deploy Now account and click Add new project. Next, choose your newly created project. With your selection Deploy Now will try to detect your framework specific settings on the fly and suggest an appropriate project package. With Vue Deploy Now will propose a NodeJS build step with prefilled inputs from the package.json of the repository. All defaults in this case should be fine. Just proceed and finalize the setup.

Now, take a short break until your project is deployed. Deploy Now will always show you the current build and deploy status of your project. If it's done Deploy Now provides a direct URL to your project.
Now, if you look at your repository you will find workflow files for build and deployment in .github/workflows. Feel free to customize your workflow from here.
Angular App
The modern web developer's platform
- Create a new Angular app:
npx -p @angular/cli@latest ng new angular-app
cd angular-app- Visit your site locally by copying localhost address from CLI stdout to your favorite browser bar.
npm run start- Now, create a new Git repository on GitHub and copy the URI of the repo to your clipboard.
Afterwards initialize git and push your project to the created GitHub repository by the following commands.
git init -b main
git add .
git commit -m "initial commit"
git remote add origin git@github.com:username/reponame.git # replace by URI of your repo
git push -u origin main- Setup deployment
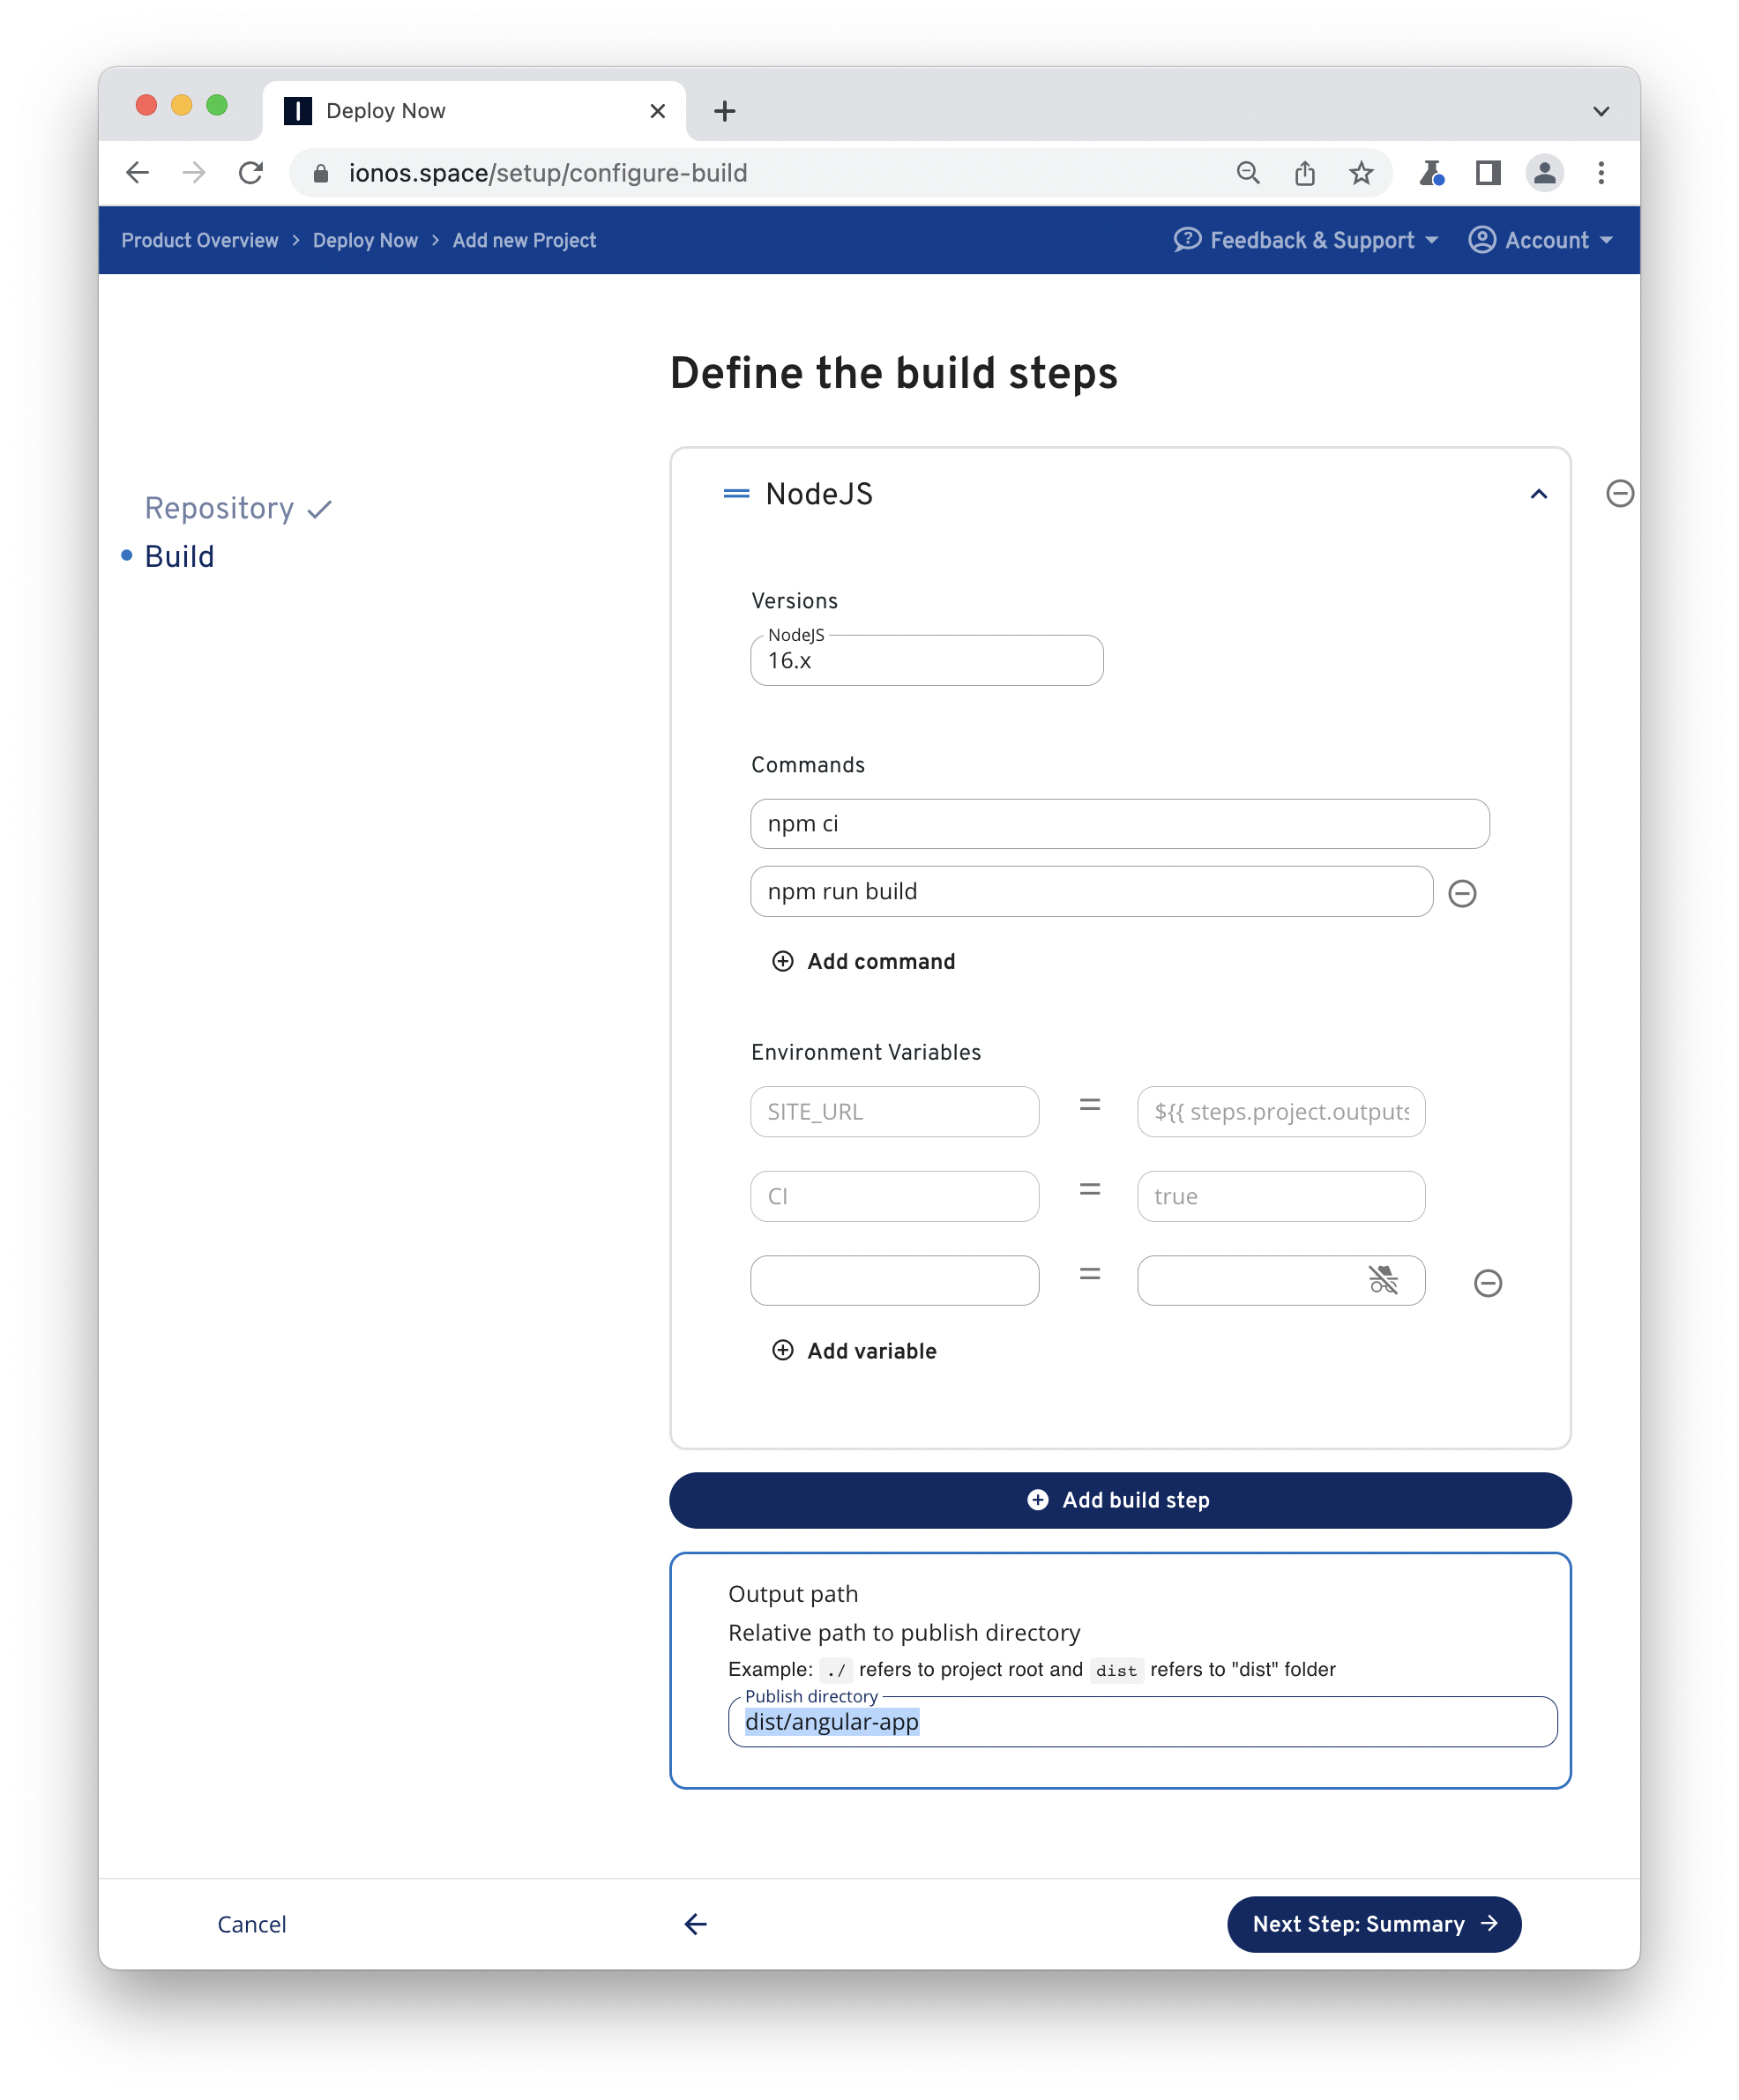
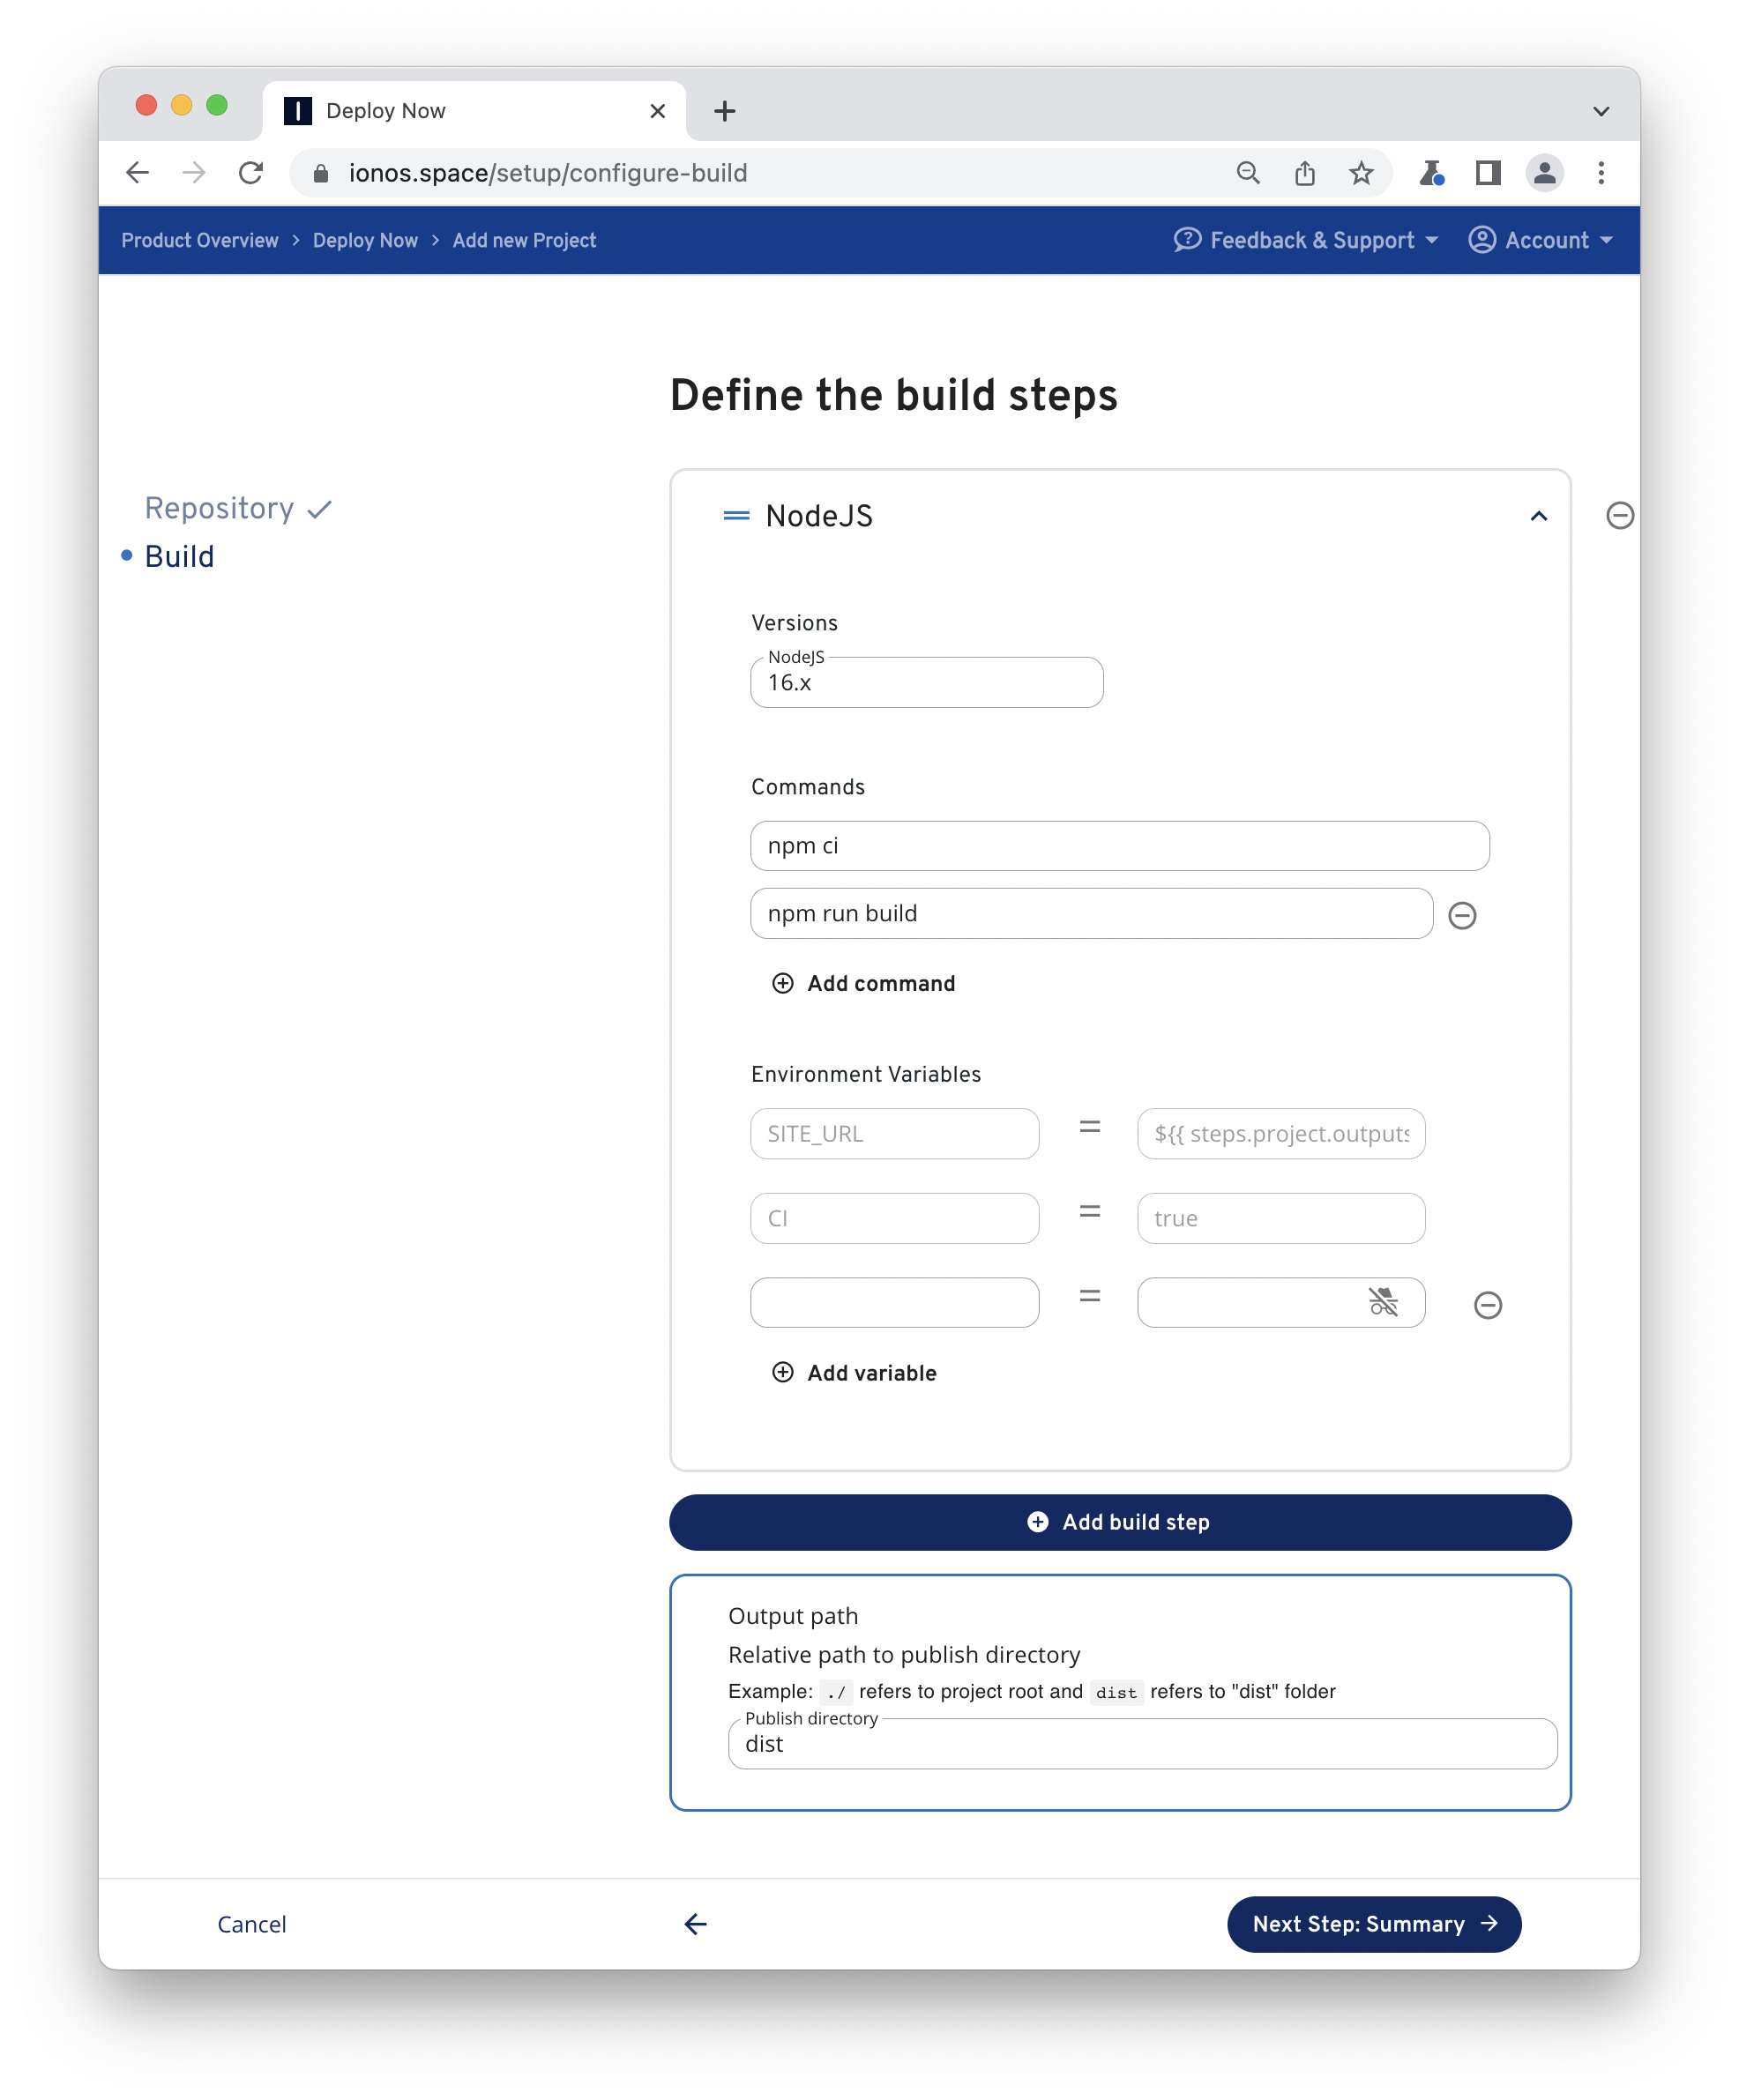
Sign in to your Deploy Now account and click Add new project. Next, choose your newly created project. With your selection Deploy Now will try to detect your framework specific settings on the fly and suggest an appropriate project package. With Angular Deploy Now will propose a NodeJS build step with prefilled inputs from the package.json of the repository. All defaults in this case should be fine. Be aware that your dist folder depends on your Angular folder structure.
From here proceed and finalize the setup.
Now, take a short break until your project is deployed. Deploy Now will always show you the current build and deploy status of your project. If it's done Deploy Now provides a direct URL to your project.
Now, if you look at your repository you will find workflow files for build and deployment in .github/workflows. Feel free to customize your workflow from here.
Svelte App
Cybernetically enhanced web app
- Create a new Svelte app:
npm create svelte@latest svelte-app
cd svelte-app
npm i- Visit your site locally by copying localhost address from CLI stdout to your favorite browser bar.
npm run dev- Now, create a new Git repository on GitHub and copy the URI of the repo to your clipboard.
Afterwards initialize git and push your project to the created GitHub repository by the following commands.
git init -b main
git add .
git commit -m "initial commit"
git remote add origin git@github.com:username/reponame.git # replace by URI of your repo
git push -u origin main- Setup deployment
Sign in to your Deploy Now account and click Add new project. Next, choose your newly created project. With your selection Deploy Now will try to detect your framework specific settings on the fly and suggest an appropriate project package. With Svelte Deploy Now will propose a NodeJS build step with prefilled inputs from the package.json of the repository. All defaults in this case should be fine. Just proceed and finalize the setup.

Now, take a short break until your project is deployed. Deploy Now will always show you the current build and deploy status of your project. If it's done Deploy Now provides a direct URL to your project.
Now, if you look at your repository you will find workflow files for build and deployment in .github/workflows. Feel free to customize your workflow from here.
Ember App
A framework for ambitious web developers.
- Create a new Ember app:
npx ember-cli new ember-app- Visit your site locally by copying localhost address from CLI stdout to your favorite browser bar.
cd ember-app
npm run start
Note
The default component <WelcomePage /> isn't rendered properly in production mode and leads to errors. Therefore you need to replace this component with some meaningful content or simply remove production from "build": "ember build --environment=production" in your package.json to see first of all that your site is working.
- Now, create a new Git repository on GitHub and copy the URI of the repo to your clipboard.
Afterwards initialize git and push your project to the created GitHub repository by the following commands.
git init -b main
git add .
git commit -m "initial commit"
git remote add origin git@github.com:username/reponame.git # replace by URI of your repo
git push -u origin main- Setup deployment
Sign in to your Deploy Now account and click Add new project. Next, choose your newly created project. With your selection Deploy Now will try to detect your framework specific settings on the fly and suggest an appropriate project package. With Ember Deploy Now will propose a NodeJS build step with prefilled inputs from the package.json of the repository. All defaults in this case should be fine. Just proceed and finalize the setup.

Now, take a short break until your project is deployed. Deploy Now will always show you the current build and deploy status of your project. If it's done Deploy Now provides a direct URL to your project.
Now, if you look at your repository you will find workflow files for build and deployment in .github/workflows. Feel free to customize your workflow from here.
Ionic App
Ionic Framework's app development platform builds amazing cross-platform mobile, web, and desktop apps all with one shared code base and open-web standards.
- Create a new Ionic app:
npx @ionic/cli@latest start ionic-app list --type=react --no-link- Visit your site locally by copying localhost address from CLI stdout to your favorite browser bar.
cd ionic-app
npm run start- Now, create a new Git repository on GitHub and copy the URI of the repo to your clipboard.
Afterwards initialize git and push your project to the created GitHub repository by the following commands.
git init -b main
git add .
git commit -m "initial commit"
git remote add origin git@github.com:username/reponame.git # replace by URI of your repo
git push -u origin main- Setup deployment
Sign in to your Deploy Now account and click Add new project. Next, choose your newly created project. With your selection Deploy Now will try to detect your framework specific settings on the fly and suggest an appropriate project package. Ionic supports under the hood Angular, React and Vue.js - According to the selected framework Deploy Now will propose a NodeJS build step with prefilled inputs from the package.json of the repository. All defaults in this case should be fine. Just proceed and finalize the setup.

Now, take a short break until your project is deployed. Deploy Now will always show you the current build and deploy status of your project. If it's done Deploy Now provides a direct URL to your project.
Now, if you look at your repository you will find workflow files for build and deployment in .github/workflows. Feel free to customize your workflow from here.
Static Site Generators
A Static Site Generator (SSG) is a tool which run as part of a build to transform content, data, and templates into files which can be deployed to a hosting environment as a ready-to-serve web site.
Astro Site
Astro is an all-in-one web framework for building fast, content-focused websites.
- Create a new site by entering the following commands in your terminal:
npm create astro@latest- Visit your site locally by copying localhost address from CLI stdout to your favorite browser bar.
cd <new project dir>
npm run dev- Now, create a new Git repository on GitHub and copy the URI of the repo to your clipboard.
Afterwards initialize git and push your project to the created GitHub repository by the following commands.
git init -b main
git add .
git commit -m "initial commit"
git remote add origin git@github.com:username/reponame.git # replace by URI of your repo
git push -u origin main- Setup deployment
Sign in to your Deploy Now account and click Add new project. Next, choose your newly created project. With your selection Deploy Now will try to detect your framework specific settings on the fly and suggest an appropriate project package. With Astro Deploy Now will propose a NodeJS build step with prefilled inputs from the package.json of the repository. All defaults in this case should be fine. Just proceed and finalize the setup.
Now, take a short break until your project is deployed. Deploy Now will always show you the current build and deploy status of your project. If it's done Deploy Now provides a direct URL to your project.
Now, if you look at your repository you will find workflow files for build and deployment in .github/workflows. Feel free to customize your workflow from here.
Docusaurus Site
Build optimized websites quickly, focus on your content with Docusaurus.
- Create a new site by entering the following commands in your terminal:
npx @docusaurus/init@latest init docusaurus-site classic- Visit your site locally by copying localhost address from CLI stdout to your favorite browser bar.
cd docusaurus-site
yarn start- Now, create a new Git repository on GitHub and copy the URI of the repo to your clipboard.
Afterwards initialize git and push your project to the created GitHub repository by the following commands.
git init -b main
git add .
git commit -m "initial commit"
git remote add origin git@github.com:username/reponame.git # replace by URI of your repo
git push -u origin main- Setup deployment
Sign in to your Deploy Now account and click Add new project. Next, choose your newly created project. With your selection Deploy Now will try to detect your framework specific settings on the fly and suggest an appropriate project package. With Docusaurus Deploy Now will propose a NodeJS build step with prefilled inputs from the package.json of the repository. All defaults in this case should be fine. Just proceed and finalize the setup.

Now, take a short break until your project is deployed. Deploy Now will always show you the current build and deploy status of your project. If it's done Deploy Now provides a direct URL to your project.
Now, if you look at your repository you will find workflow files for build and deployment in .github/workflows. Feel free to customize your workflow from here.
Gatsby Site
Gatsby is a React-based, open source static site generator that pulls data via GraphQL to a wide range of content sources.
- Create a new site by entering the following commands in your terminal:
npx gatsby-cli@latest new gatsby-site- Visit your site locally by copying localhost address from CLI stdout to your favorite browser bar.
cd gatsby-site
npm run develop- Now, create a new Git repository on GitHub and copy the URI of the repo to your clipboard.
Afterwards initialize git and push your project to the created GitHub repository by the following commands.
git init -b main
git add .
git commit -m "initial commit"
git remote add origin git@github.com:username/reponame.git # replace by URI of your repo
git push -u origin main- Setup deployment
Sign in to your Deploy Now account and click Add new project. Next, choose your newly created project. With your selection Deploy Now will try to detect your framework specific settings on the fly and suggest an appropriate project package. With Gatsby Deploy Now will propose a NodeJS build step with prefilled inputs from the package.json of the repository. All defaults in this case should be fine. Just proceed and finalize the setup.

Now, take a short break until your project is deployed. Deploy Now will always show you the current build and deploy status of your project. If it's done Deploy Now provides a direct URL to your project.
Now, if you look at your repository you will find workflow files for build and deployment in .github/workflows. Feel free to customize your workflow from here.
Gridsome Site
Gridsome is a Vue-based, open source static site generator that pulls data via GraphQL to a wide range of content sources.
- Create a new site by entering the following commands in your terminal:
npx @gridsome/cli@latest create gridsome-site- Visit your site locally by copying localhost address from CLI stdout to your favorite browser bar.
cd gridsome-site
npm run develop- Now, create a new Git repository on GitHub and copy the URI of the repo to your clipboard.
Afterwards initialize git and push your project to the created GitHub repository by the following commands.
git init -b main
git add .
git commit -m "initial commit"
git remote add origin git@github.com:username/reponame.git # replace by URI of your repo
git push -u origin main- Setup deployment
Sign in to your Deploy Now account and click Add new project. Next, choose your newly created project. With your selection Deploy Now will try to detect your framework specific settings on the fly and suggest an appropriate project package. With Gridsome Deploy Now will propose a NodeJS build step with prefilled inputs from the package.json of the repository. All defaults in this case should be fine. Just proceed and finalize the setup.

Now, take a short break until your project is deployed. Deploy Now will always show you the current build and deploy status of your project. If it's done Deploy Now provides a direct URL to your project.
Now, if you look at your repository you will find workflow files for build and deployment in .github/workflows. Feel free to customize your workflow from here.
Hexo Site
Hexo is a fast, simple & powerful blog framework, powered by Node.js and NPM.
- Create a new site by entering the following commands in your terminal:
npx hexo-cli@latest init hexo-site
cd hexo-site
npm i- Visit your site locally by copying localhost address from CLI stdout to your favorite browser bar.
npm run server- Now, create a new Git repository on GitHub and copy the URI of the repo to your clipboard.
Afterwards initialize git and push your project to the created GitHub repository by the following commands.
git init -b main
git add .
git commit -m "initial commit"
git remote add origin git@github.com:username/reponame.git # replace by URI of your repo
git push -u origin main- Setup deployment
Sign in to your Deploy Now account and click Add new project. Next, choose your newly created project. With your selection Deploy Now will try to detect your framework specific settings on the fly and suggest an appropriate project package. With Hexo Deploy Now will propose a NodeJS build step with prefilled inputs from the package.json of the repository. All defaults in this case should be fine. Just proceed and finalize the setup.

Now, take a short break until your project is deployed. Deploy Now will always show you the current build and deploy status of your project. If it's done Deploy Now provides a direct URL to your project.
Now, if you look at your repository you will find workflow files for build and deployment in .github/workflows. Feel free to customize your workflow from here.
Jigsaw Site
Jigsaw is a framework for rapidly building static sites using the same modern tooling that powers your web applications.
- Create a new site by entering the following commands in your terminal:
mkdir jigsaw-site
cd jigsaw-site
composer require tightenco/jigsaw
vendor/bin/jigsaw init docs- Visit your site locally by copying localhost address from CLI stdout to your favorite browser bar.
vendor/bin/jigsaw serve- Now, create a new Git repository on GitHub and copy the URI of the repo to your clipboard.
Afterwards initialize git and push your project to the created GitHub repository by the following commands.
git init -b main
git add .
git commit -m "initial commit"
git remote add origin git@github.com:username/reponame.git # replace by URI of your repo
git push -u origin main- Setup deployment
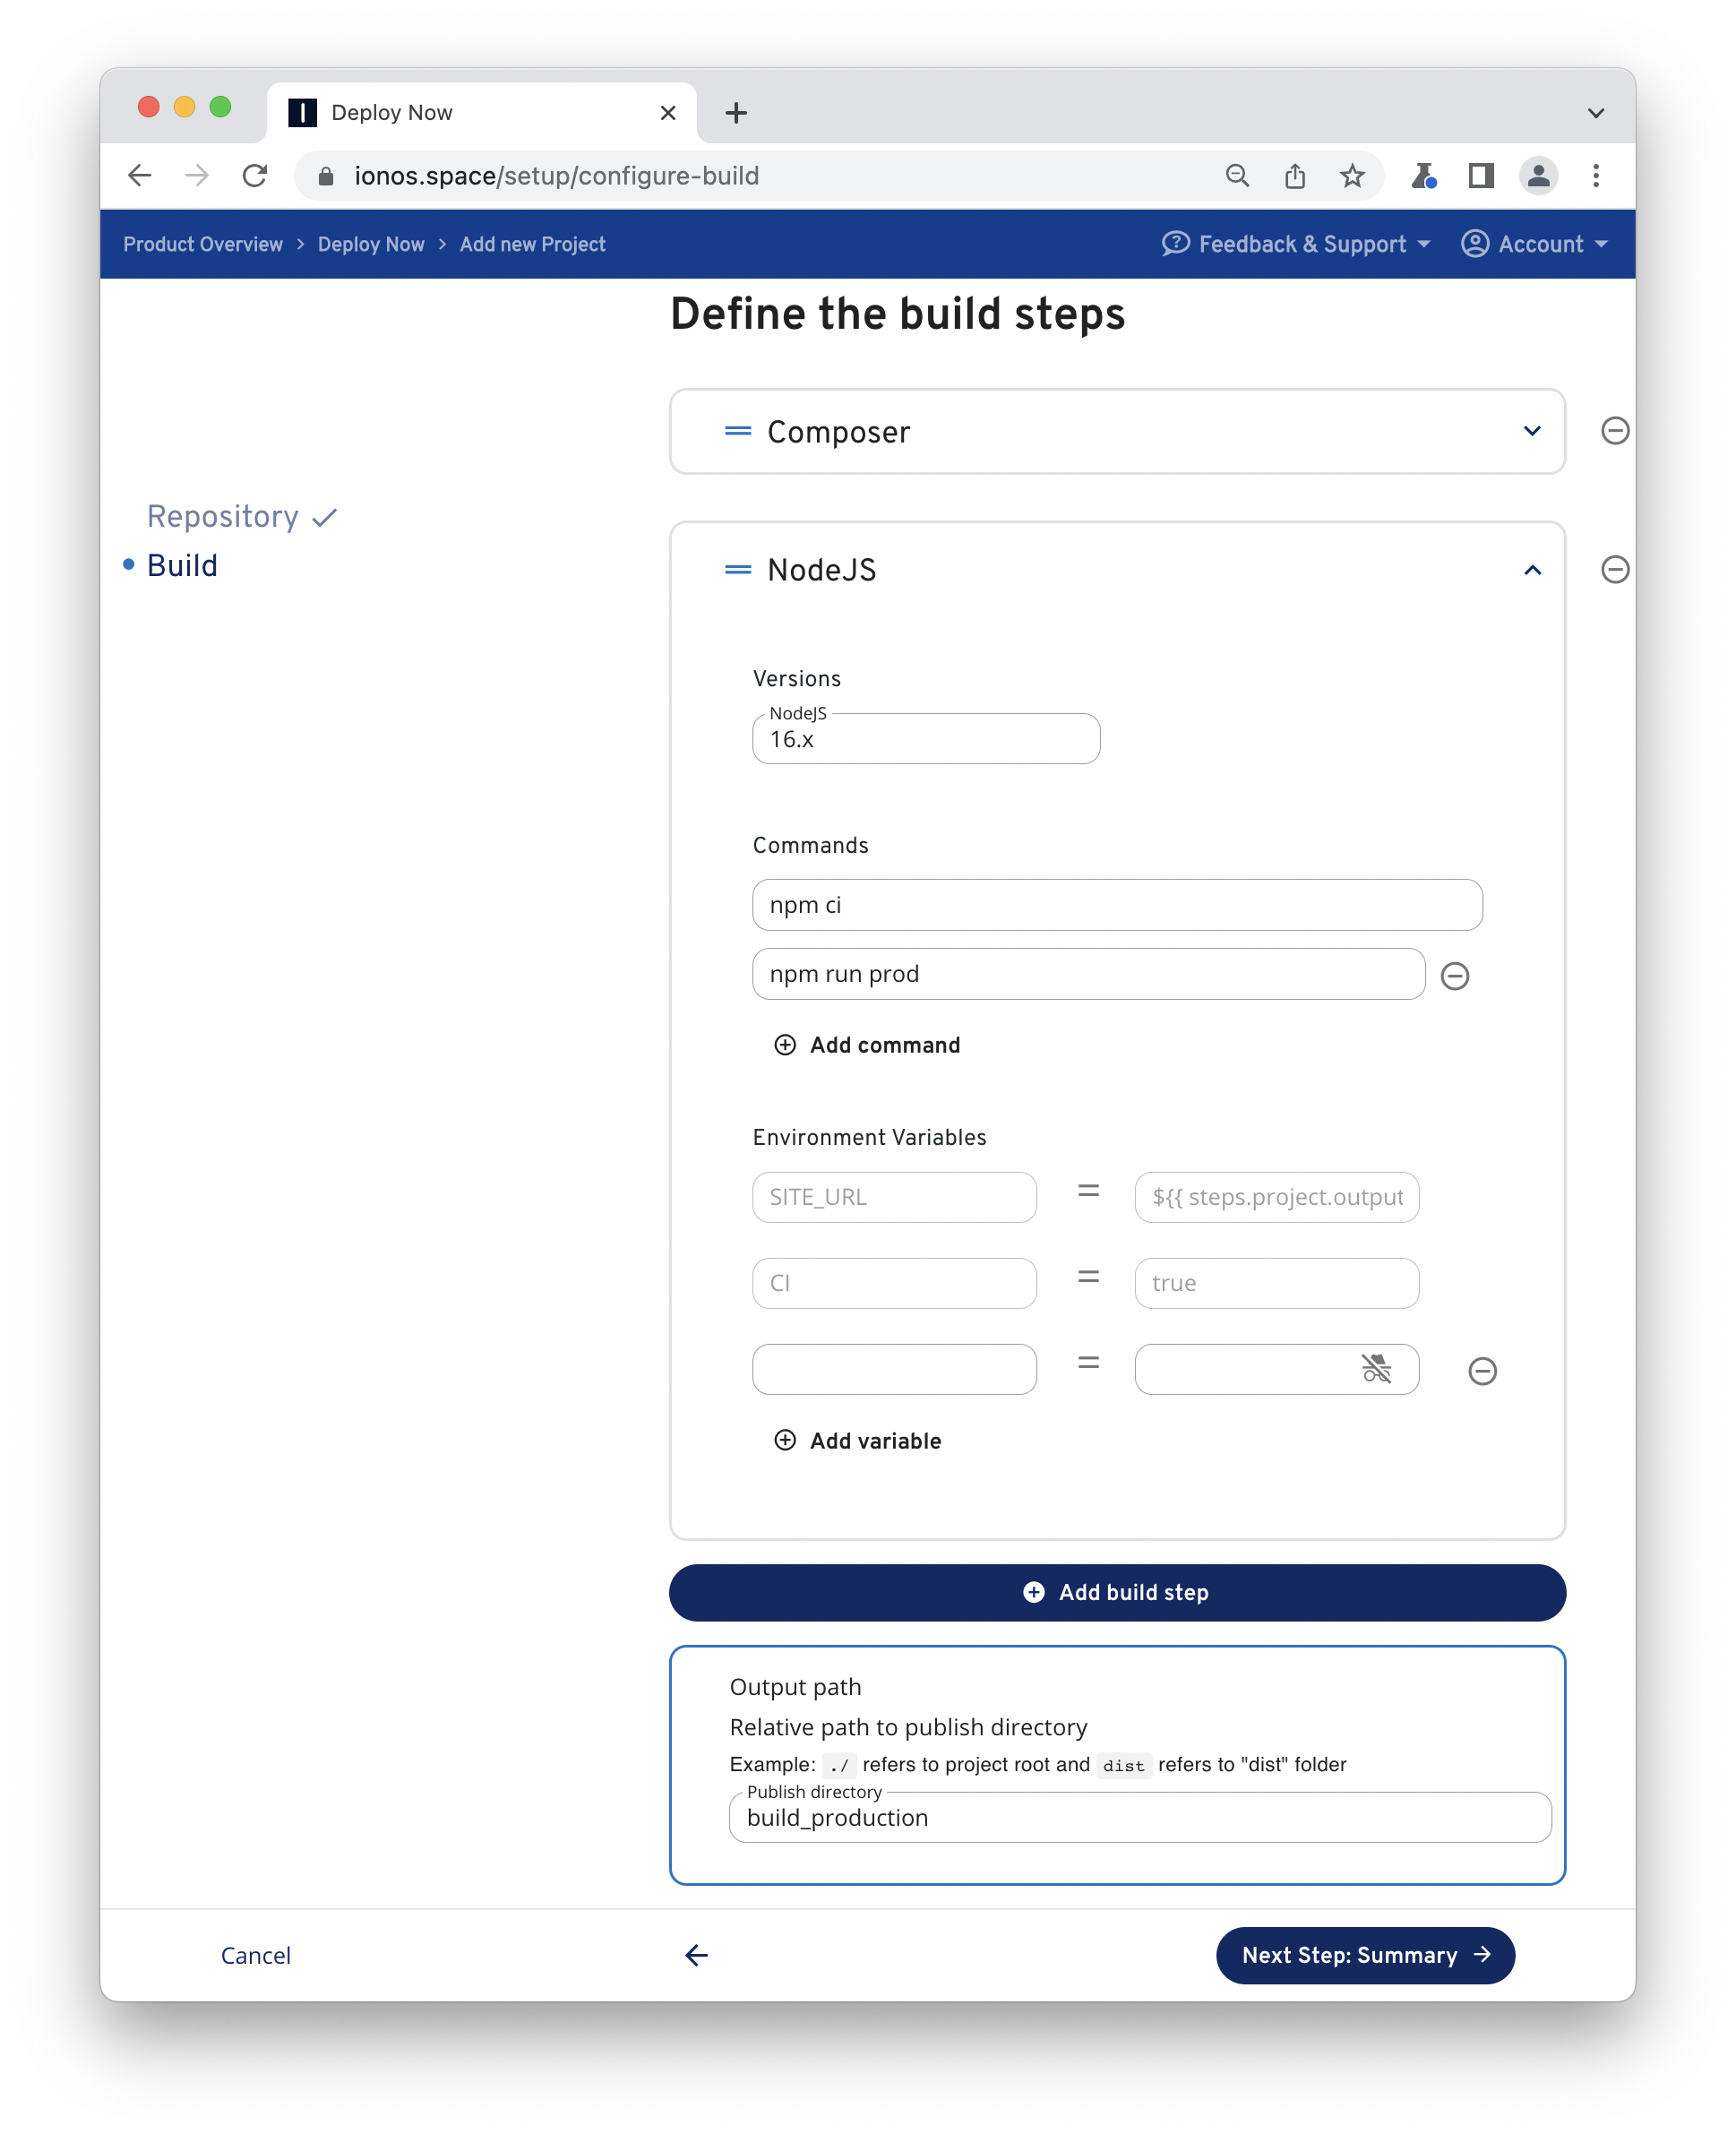
Sign in to your Deploy Now account and click Add new project. Next, choose your newly created project. With your selection Deploy Now will try to detect your framework specific settings on the fly and suggest an appropriate project package. With Jigsaw Deploy Now will propose a Composer and a NodeJS build step with prefilled inputs. All defaults in this case should be fine. Just proceed and finalize the setup.
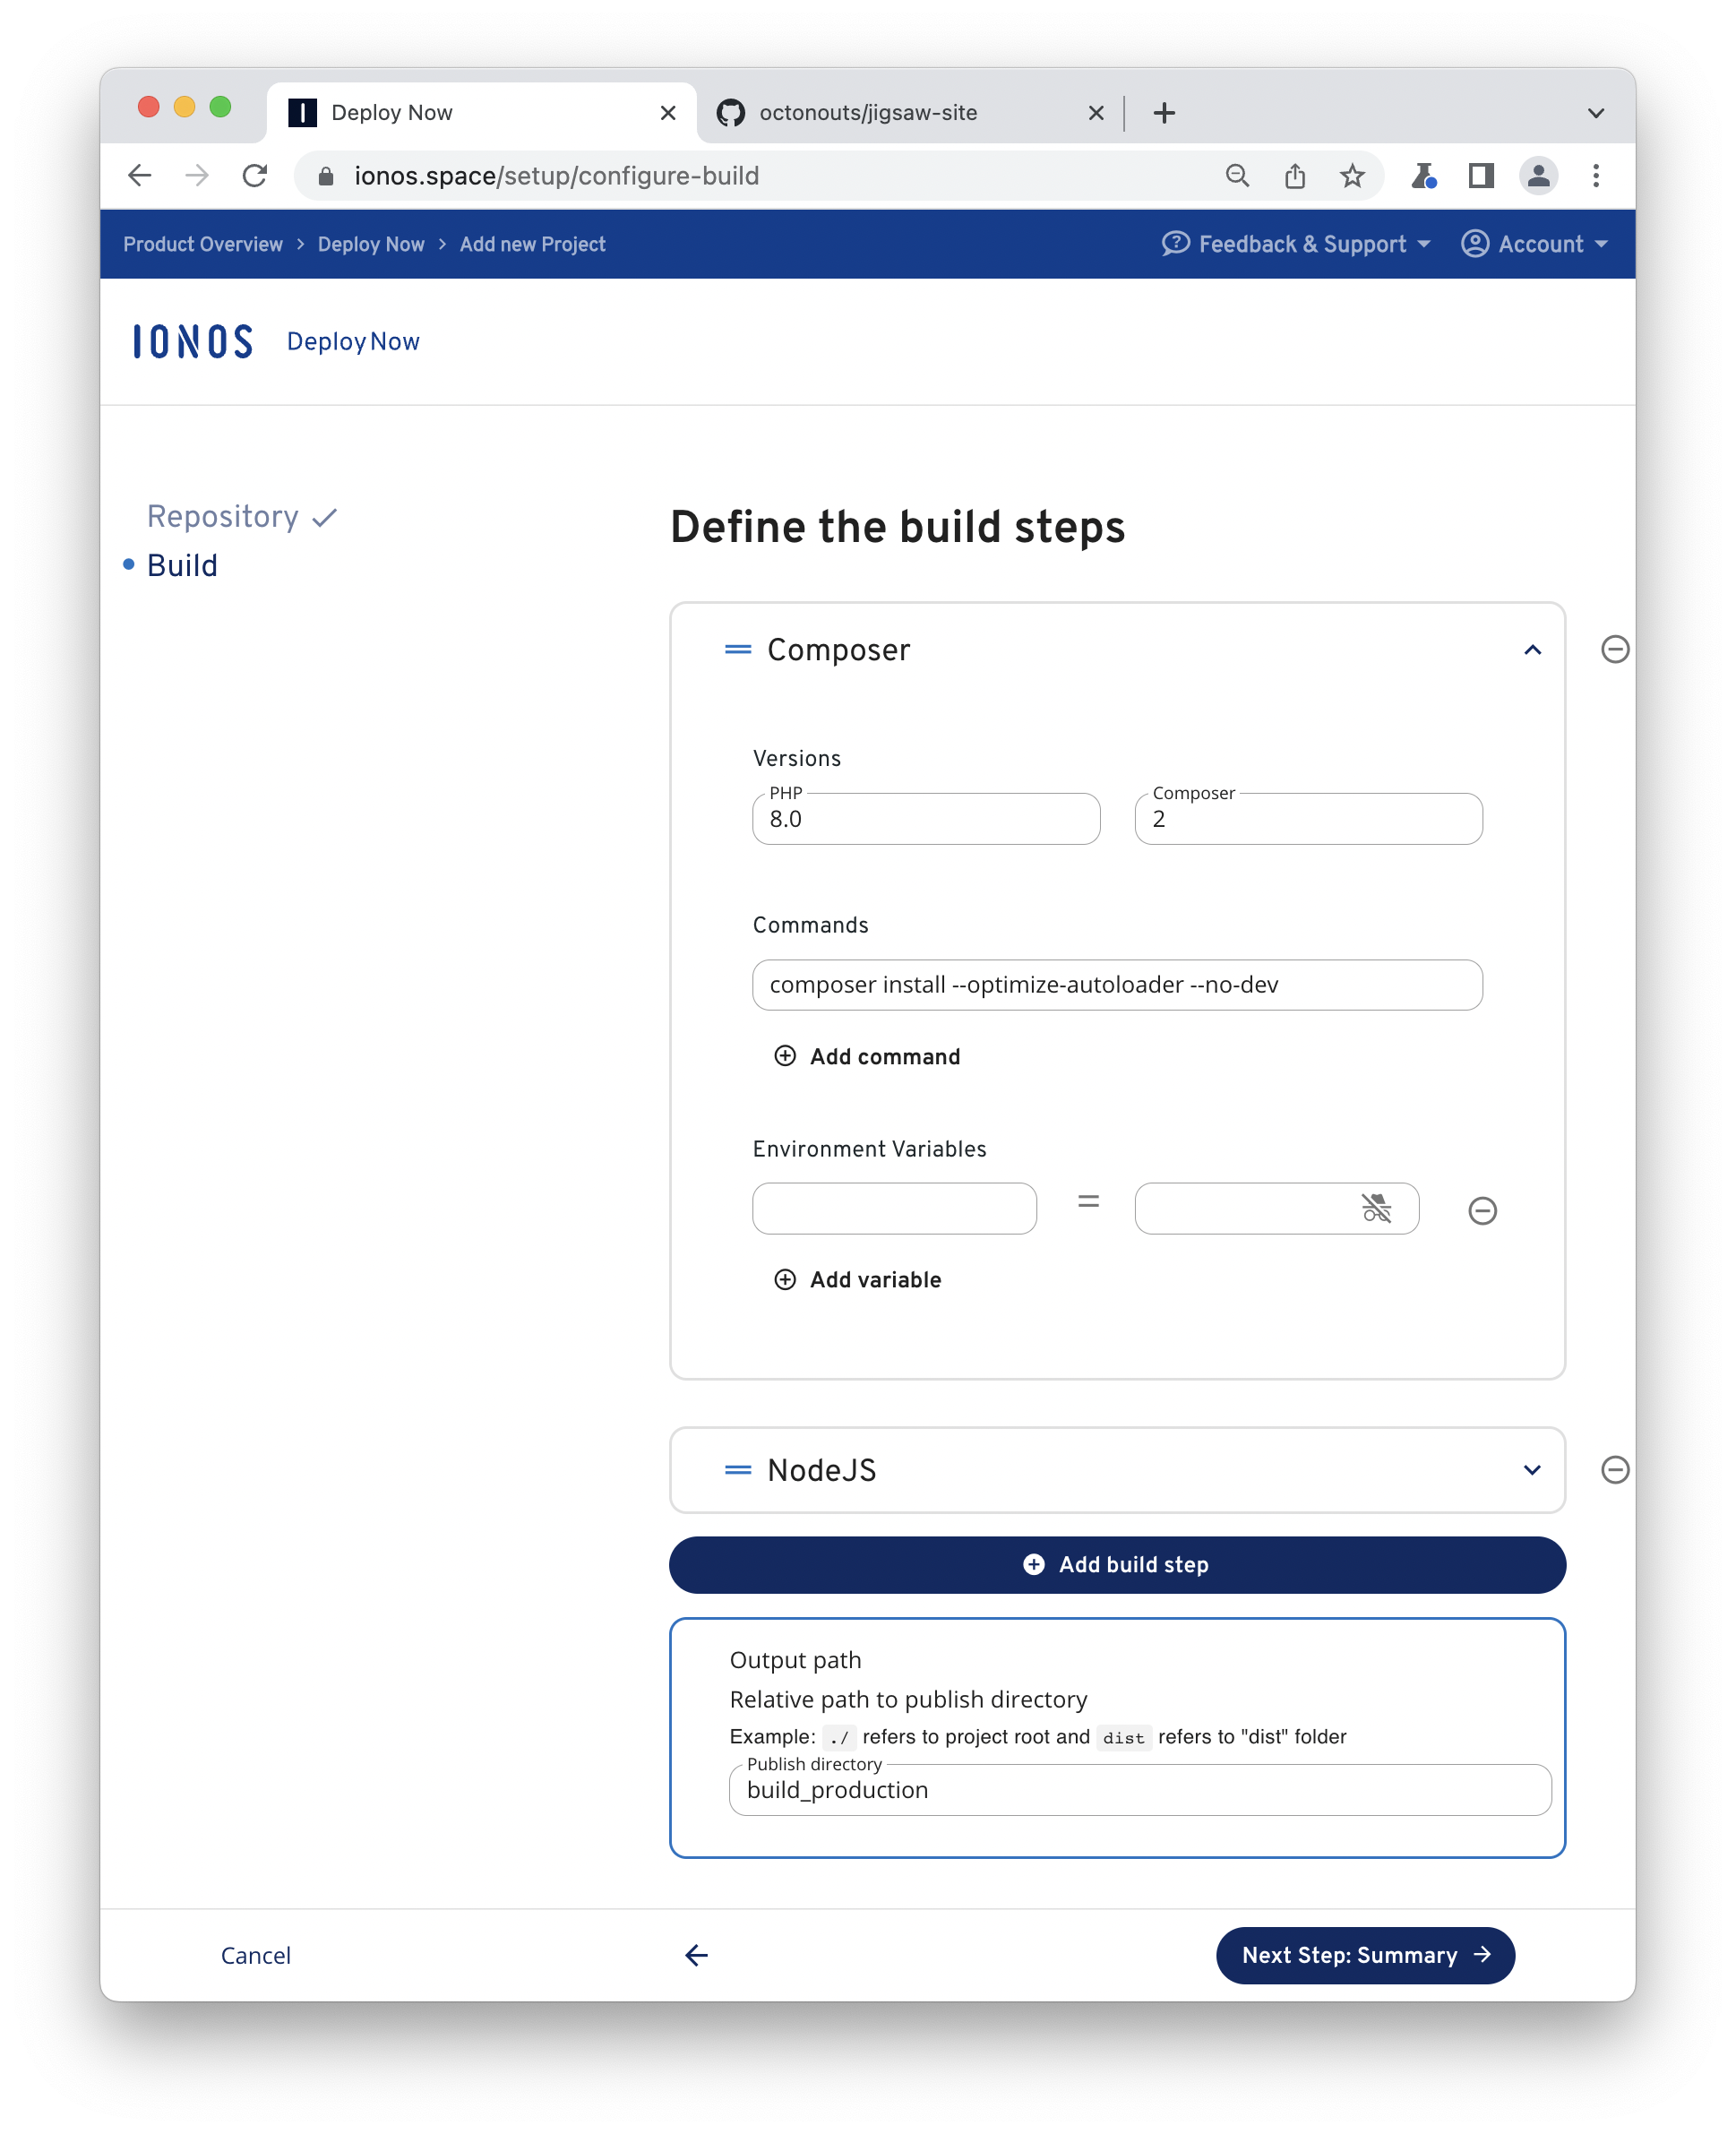
Now, take a short break until your project is deployed. Deploy Now will always show you the current build and deploy status of your project. If it's done Deploy Now provides a direct URL to your project.
Now, if you look at your repository you will find workflow files for build and deployment in .github/workflows. Feel free to customize your workflow from here.
Hybrid SSG Tools
A few frameworks build a bridge between Server Side Rendering (SSR) and Static Site Generation (SSG). At the moment Deploy Now supports only the SSG approach. Support of SSRs is planned with more runtime options in future.
NextJS Site
Next.js: The React Framework for Production
- Create a new site by entering the following commands in your terminal:
npx create-next-app@latest next-site --example basic-css- Visit your site locally by copying localhost address from CLI stdout to your favorite browser bar.
cd next-site
npx next@latest dev- Enable static HTML export
You have to explicit define that you want to export your site as static version. Therefore add the following lines into your package.json.
"scripts": {
    ...
    "export": "next build && next export"
},- Now, create a new Git repository on GitHub and copy the URI of the repo to your clipboard.
Afterwards initialize git and push your project to the created GitHub repository by the following commands.
git init -b main
git add .
git commit -m "initial commit"
git remote add origin git@github.com:username/reponame.git # replace by URI of your repo
git push -u origin main- Setup deployment
Sign in to your Deploy Now account and click Add new project. Next, choose your newly created project. With your selection Deploy Now will try to detect your framework specific settings on the fly and suggest an appropriate project package. With NextJS Deploy Now will propose a NodeJS build step with prefilled inputs from the package.json of the repository. All defaults in this case should be fine. Just proceed and finalize the setup.

Now, take a short break until your project is deployed. Deploy Now will always show you the current build and deploy status of your project. If it's done Deploy Now provides a direct URL to your project.
Now, if you look at your repository you will find workflow files for build and deployment in .github/workflows. Feel free to customize your workflow from here.
NuxtJS Site
Build your next Vue.js application with confidence using NuxtJS: a framework making web development simple and powerful.
- Create a new site by entering the following commands in your terminal:
Note
Be aware to choose "Static (Static/Jamstack hosting)" as deployment target. Deploy Now doesn't support server side node applications yet.
npx create-nuxt-app@latest nuxt-site
cd nuxt-site
npm i- Visit your site locally by copying localhost address from CLI stdout to your favorite browser bar.
npm run dev- Now, create a new Git repository on GitHub and copy the URI of the repo to your clipboard.
Afterwards initialize git and push your project to the created GitHub repository by the following commands.
git init -b main
git add .
git commit -m "initial commit"
git remote add origin git@github.com:username/reponame.git # replace by URI of your repo
git push -u origin main- Setup deployment
Sign in to your Deploy Now account and click Add new project. Next, choose your newly created project. With your selection Deploy Now will try to detect your framework specific settings on the fly and suggest an appropriate project package. With NuxtJS Deploy Now will propose a NodeJS build step with prefilled inputs from the package.json of the repository. All defaults in this case should be fine. Just proceed and finalize the setup.
Now, take a short break until your project is deployed. Deploy Now will always show you the current build and deploy status of your project. If it's done Deploy Now provides a direct URL to your project.
Now, if you look at your repository you will find workflow files for build and deployment in .github/workflows. Feel free to customize your workflow from here.
Binary SSG Tools
Some SSGs rely on single binaries and skip complex dependency management.
Hugo Site
Hugo is the world’s fastest framework for building websites
- Requires pre-install of
hugo. See installation instructions. - Create a new site by entering the following commands in your terminal:
hugo new site hugo-site
cd hugo-site
git init -b main
git submodule add https://github.com/theNewDynamic/gohugo-theme-ananke.git themes/ananke
echo theme = \"ananke\" >> config.toml
hugo new posts/my-first-post.md
echo "---
title: "My First Post"
date: 2022-01-01T12:12:12+01:00
draft: false
---" > content/posts/my-first-post.md- Visit your site locally by copying localhost address from CLI stdout to your favorite browser bar.
hugo server -D- Now, create a new Git repository on GitHub and copy the URI of the repo to your clipboard.
Afterwards initialize git and push your project to the created GitHub repository by the following commands.
git add .
git commit -m "initial commit"
git remote add origin git@github.com:username/reponame.git # replace by URI of your repo
git push -u origin main- Setup deployment
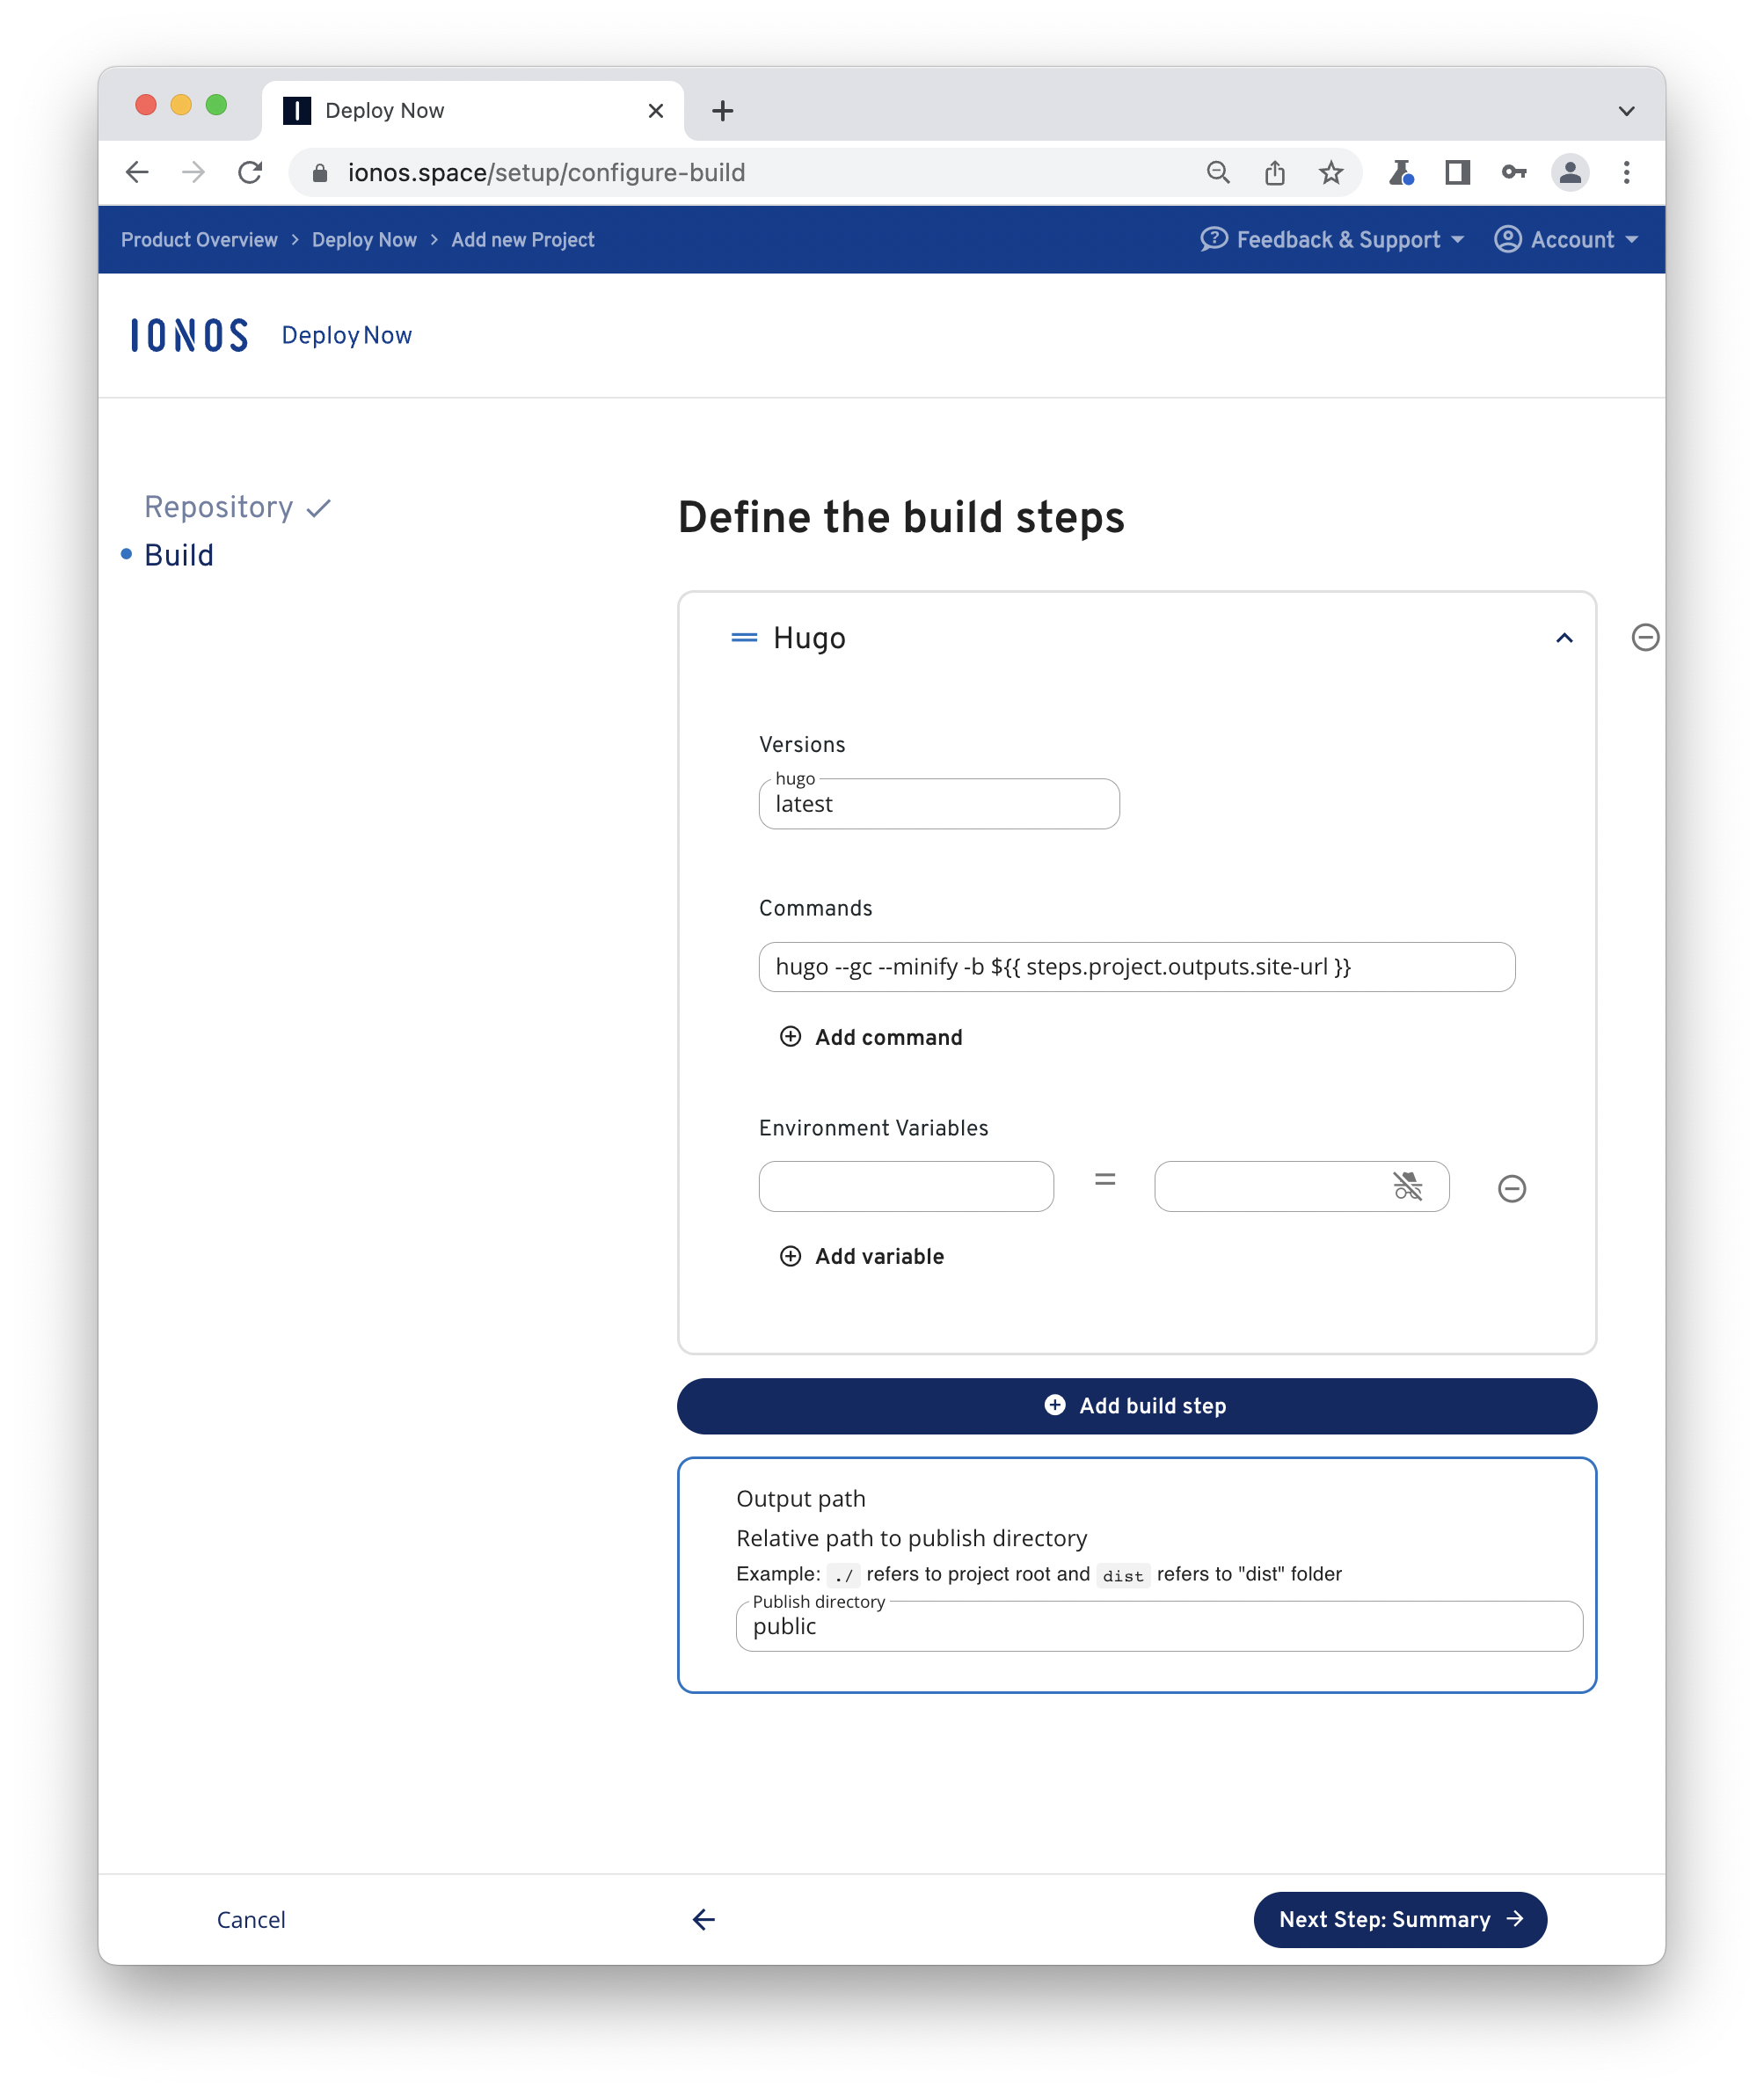
Sign in to your Deploy Now account and click Add new project. Next, choose your newly created project. With your selection Deploy Now will try to detect your framework specific settings on the fly and suggest an appropriate project package. With Hugo Deploy Now will propose a Hugo build step with prefilled inputs. All defaults in this case should be fine. Just proceed and finalize the setup.
Now, take a short break until your project is deployed. Deploy Now will always show you the current build and deploy status of your project. If it's done Deploy Now provides a direct URL to your project.
Now, if you look at your repository you will find workflow files for build and deployment in .github/workflows. Feel free to customize your workflow from here.
Jekyll Site
Jekyll transforms your plain text into static websites and blogs.
- Requires pre-install of
jekyll. See installation instructions. - Create a new site by entering the following commands in your terminal:
jekyll new jekyll-siteNote
Note that you run the following command if your local setup doesn't match a Linux-powered machine.
bundle lock --add-platform x86_64-linuxThis will save you from unexpected errors in the build process. Reason is the GitHub Runners architecture.
- Visit your site locally by copying localhost address from CLI stdout to your favorite browser bar.
jekyll serve- Now, create a new Git repository on GitHub and copy the URI of the repo to your clipboard.
Afterwards initialize git and push your project to the created GitHub repository by the following commands.
git init -b main
git add .
git commit -m "initial commit"
git remote add origin git@github.com:username/reponame.git # replace by URI of your repo
git push -u origin main- Setup deployment
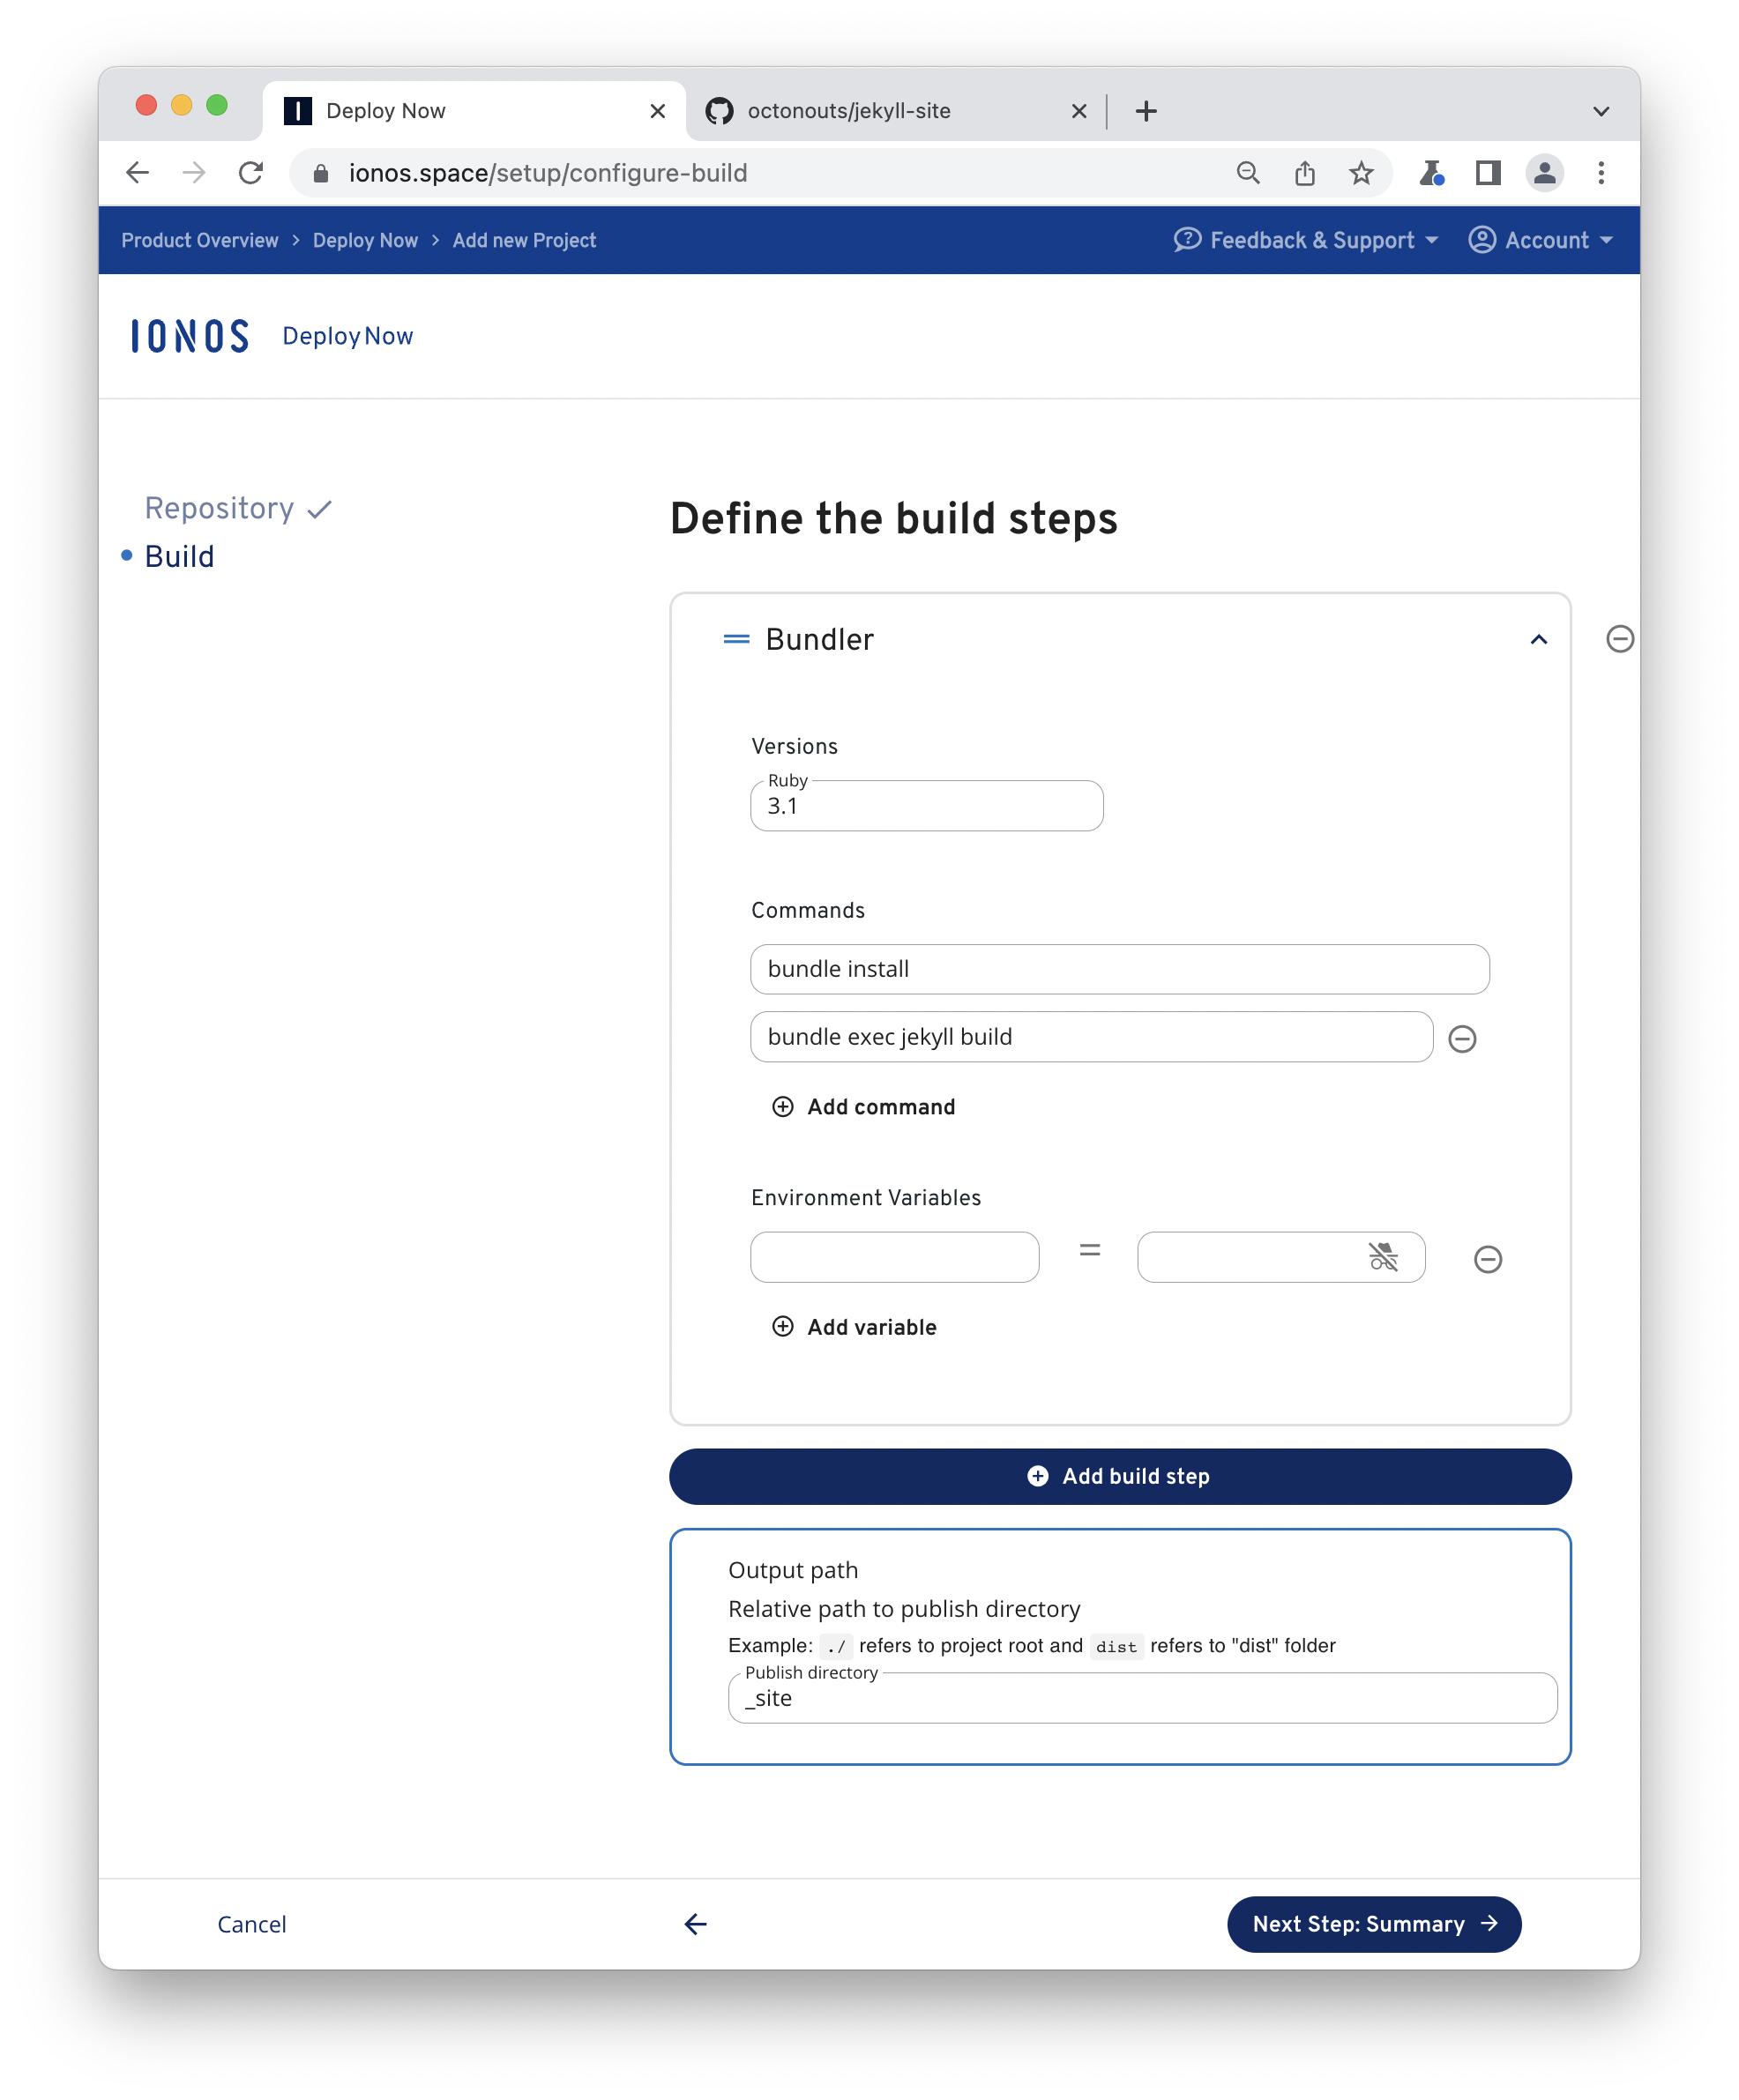
Sign in to your Deploy Now account and click Add new project. Next, choose your newly created project. With your selection Deploy Now will try to detect your framework specific settings on the fly and suggest an appropriate project package. With Jekyll Deploy Now will propose a Bundler build step with prefilled inputs from the Gemfile of the repository. All defaults in this case should be fine. Just proceed and finalize the setup.
Now, take a short break until your project is deployed. Deploy Now will always show you the current build and deploy status of your project. If it's done Deploy Now provides a direct URL to your project.
Now, if you look at your repository you will find workflow files for build and deployment in .github/workflows. Feel free to customize your workflow from here.
